Back
Contents
1. Sales Order
1.1 Sales Order Overview
1.2 Creating a new Order from a Quote
1.3 Creating a new Sales Order
1.4 Adding sections to the Sales Order
1.5 Sales Order status and lifecycle
1. Sales Order
1.1 Sales Order Overview<
The Sales Order screen is used to capture orders on the system for a selected customer. To access the Sales Order, click on the Order/Quotes menu in the Customers tab as highlighted below.

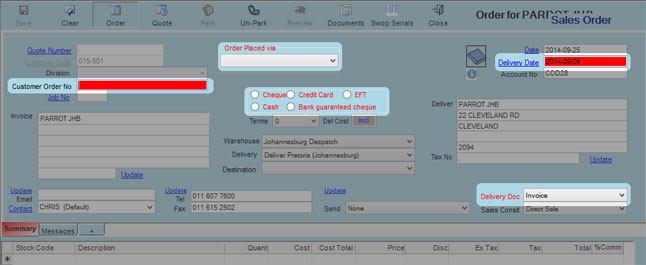
In the Sales Order screen shown below, you can create a new order by selecting a Customer Code OR by selecting an existing Quote and creating an order from the selected Quote (See the Quotes section on how to create quotations for customers).
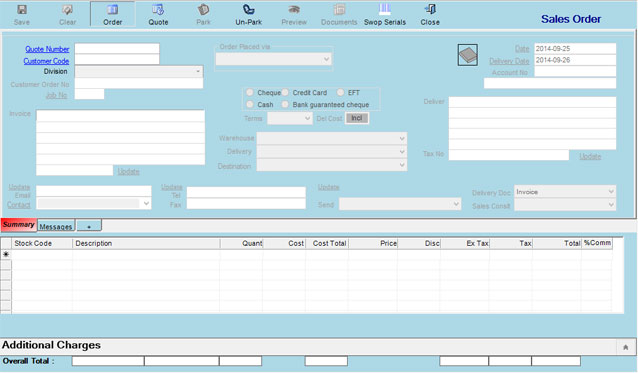
The following actions is available from the top buttons on the Sales Order screen.
Save – This will save the Order (or quotation) once completed
Order / Quote – This is to either create an order or a quote
Park / Un-Park – This will save the order in order to Un-Park the order later and continue working before creating the order.
Preview – This will show a preview of the printed order.
Documents – This enables you to attach documents related to this order, e.g. an email from the customer.

1.2 Creating a new Order from a Quote
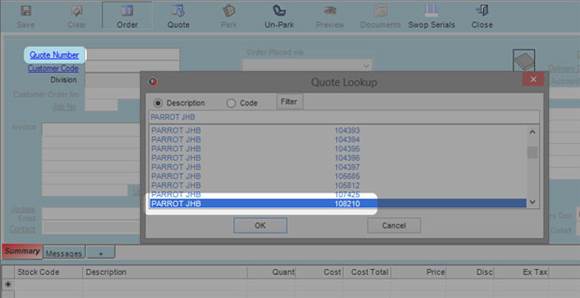
To create a new order from an existing quote, simply open the Sales Order screen and click on the Quote Number link. A screen will then appear with a list of quotes that you can select from. Click on the quote that you wish to use, and then click on the OK button.
If you already know the Quote Number that you will be using to create the order, simply type in the quote number and press the Tab key.
Once you’ve selected the quote, the screen will load all the relevant information from the quote as shown below. You can then complete the mandatory information shown in Red and then complete the order. You can also add or remove any products, or modify the existing products that’s been added from the quotation.
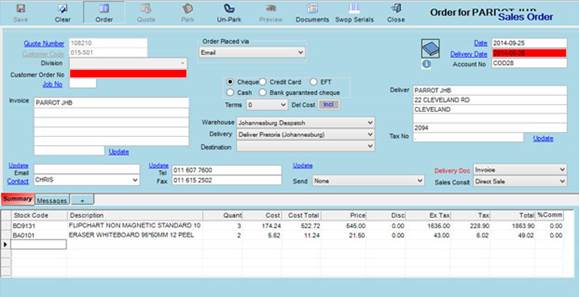
All the information above will be explained in the next point, creating a new sales order.
1.3 Creating a new Sales Order
To create a new sales order for a selected customer, open the Sales Order screen, and then click on the Customer Code link as shown below. A screen will then open where you can select the customer that you would like to create the order for.
If you know the Customer Code of the customer that you will be creating the order for, simply type in the customer code and press the Tab key.
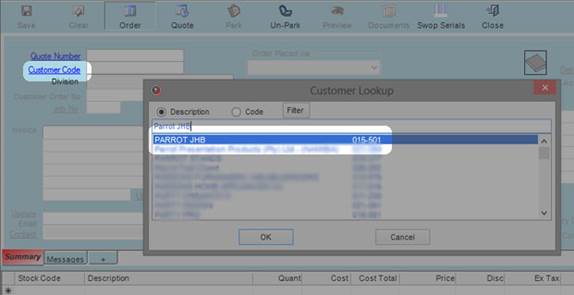
Once you have selected the customer, the Sales Order screen will have some of the customer information populated, and will highlight any mandatory fields that are required before the order can be completed or any products selected for the order.
The Invoice and Delivery address will be the default address added in the Customer screen. If for any reason the Invoice or Delivery address for this specific order is not the same, it can easily be changed to the address required. This will only be changed for this order and will not affect any other orders for this customer, and will also not change the default address in the Customer screen. If you do want to change the default address that’s shown in the Customer screen, then you can do so by clicking on the Update link below the Invoice and Delivery address.
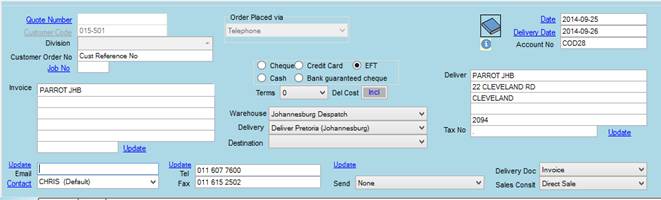
In the image above, you will notice that there are multiple Update links. Clicking any of these Update links will update the default customer information in the Customer screen.
Some of the important fields that are available in the above image:
| Customer Code |
The customer code entered or selected that this order will be created for. |
| Customer Order No |
This is a reference number, supplied by the customer. |
| Order Placed Via |
Selection on how the order was placed. |
| Date |
The order date. |
| Delivery Date |
The date that the order should be delivered. This will be calculated using the Date and then adding the lead time set for this specific customer (The lead time is set in the Customer screen, under the Marketing tab). It can also be manually changed. |
| Account No |
The customer account number. This is automatically completed and cannot be changed. |
| Invoice (Address) |
The address that will appear on the invoice. |
| Delivery (Address) |
The address where the goods will be delivered. |
| Payment Method and Terms |
The payment terms will default to the value selected in the Customer screen, but can also be changed if required. No default payment method is selected and has to be selected before saving the order. |
| Warehouse |
The warehouse that will be used to process this order. The default warehouse is set on the Customer screen. |
| Delivery |
This is an area where the customer will have the goods delivered. |
| Destination |
The Destination is only applicable if the Delivery is a courier. |
| Contact Information |
The customer’s contact information. This is also taken from the Customer screen, but can be changed as needed. |
| Delivery Doc |
This will set the type of delivery document that will be printed when invoicing this order. It will either be an invoice or a delivery note. |
| Sales Conslt |
This is to select the sales consultant responsible for the customer / sale |
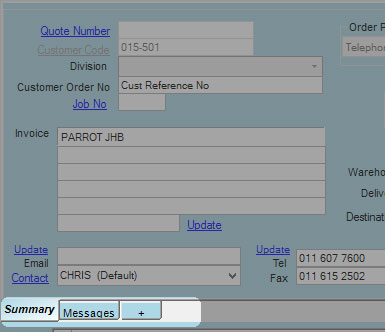
You will notice three tabs in the bottom on the order information. Summary, Messages and a plus (+) sign.
Summary: This tab will show the customer and payment information for the order. Messages: On this tab you can add any information that will be printed on the order as a Header and Footer section. Plug (+): This is used to create sections for the quotation. Each section can have different products added to it, and can also have a Section Description and Section Story added. Sections are explained in more detail below.
To add products to the order, click on the Stock Code field in the grid below the order information. You can then type in the product code and press enter, or you can double click to bring up a search screen to search for the product that you require.
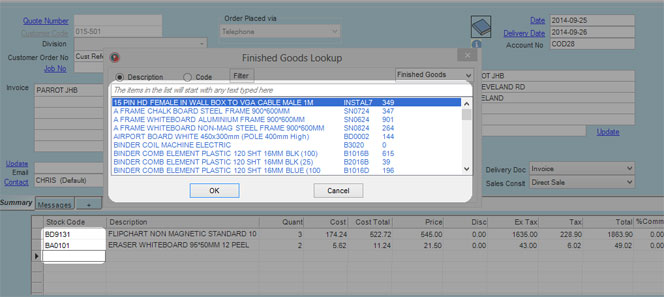
As more products gets added to the order, the financial information will be updated and displayed in the bottom of the screen.

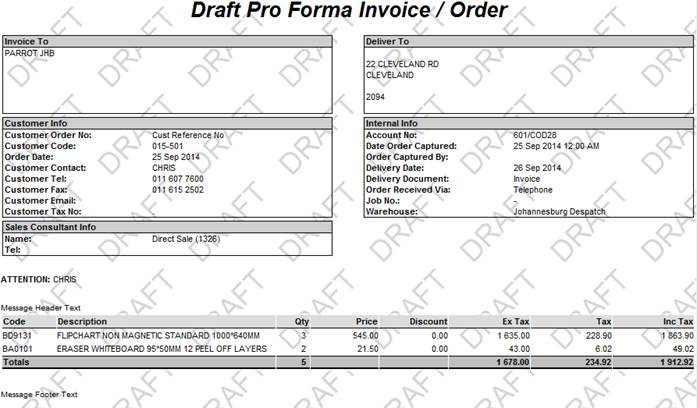
Once the order has been completed, click on the save button to create the order and print out the order information as shown below.
1.4 Adding sections to the Sales Order
Sections are ways to group products and have a description and message displayed for the products added to each section. The total for the products will also be calculated per section, and a grand total displayed at the bottom.
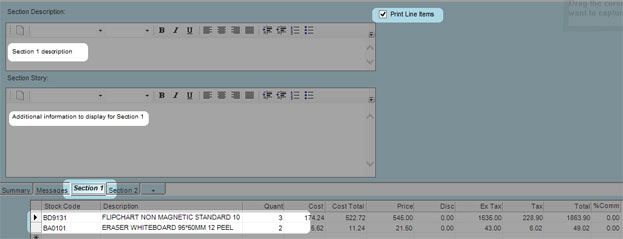
There is another option “Print Line Items” that can be set for each of the sections. This will show or hide all of the products that has been entered for that section.
Section 1 has two products added and will print the line items with the order
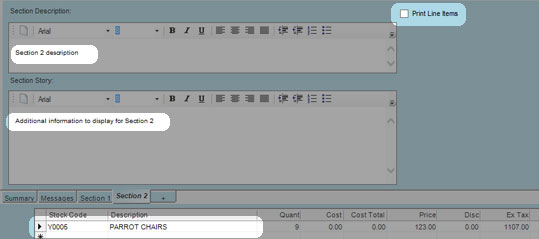
Section 2 has only one item added, and will not print the line item
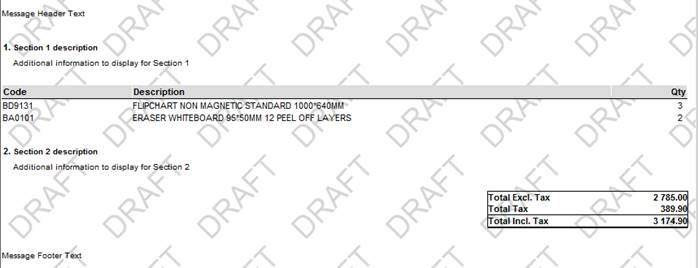
When printing out the order, the sections will be displayed as below. Each section has its description and message printed, and Section 1 has the products that’s been added to that section.
The sections also have a Header Message Text printed at the top, and Message Footer Text printed at the bottom. This has been set in the Message tab as explained above.
1.5 Sales Order status and lifecycle
The status of an order can be viewed by going to the Search Documents screen, or by going to the Order Control screen and looking for orders with a specified status or search criteria. (These screens will be explained in more details later on)
An order will have a Stock Status and a Picking Status. The stock status displays the stock for the order (complete or not), and the Picking Status displays the status that the order is at in the manufacture or picking queues.

Once a new order is created, it will have one of two possible statuses:
Wait for Payment – This will be the status for all order that’s been created for COD customers.
Order Waiting – The order will go to Order Waiting for account customers OR for COD customers if a payment has been captured for that order.
Once the stock has been allocated for the order and the status is on Order Waiting, then only will the order become available for picking (Picking will be explained in more detail later on). When a picker then gets given the order and he starts picking it, the status will change to Being Picked. If the picker then completes picking the order, it will go to an Order Packed and will then be available for invoicing.
Other Picking Statuses and descriptions
| Order Waiting |
The order is new and awaiting further processing and can be picked. |
| Wait for Payment |
The COD order requires a payment to be captured. |
| Order Void |
The order has been voided and no longer relevant. |
| Packed and Void |
&The order has been completely picked, and then voided. |
| Order Released |
The order has been released. Anything picked against this order will be cancelled. The status will be reset back to the previous status. |
| Order on Hold |
The order is on hold. |
| Service Item Only |
The items added to the order is service items (e.g. install or collection) and no actual products were added. |
| Being Picked |
The order is in the process of being picked. |
| Order Packed |
The order has been picked and can be invoiced. |
| Partially Packed |
Only part of the order has been picked. |
| Picked and on Hold |
The order has been picked but then placed on hold. |
| Force Released for Picking |
This is when the stock status for example is not complete, the order can be force released for picking if required and it will then force the order to come up for picking. |
| Cancel Request |
A request has been made to cancel the order. |
| Cancel Request and Packed |
The order has been completely picked, and a request was then made to cancel the order. |
| Archived |
The order has been process completely. |