Back
Contents
- Purpose of the document
- Overview of Repairs
- View a repair
- View an existing Repair
- Create a Repair
- How to Capture a new Repair
- Processing of Repairing
- Transfer it from Repairs Warehouse to despatch
- Setup a Repair Filter
- Setup a Repair Product Type
- Repair Header Status
- Repair Line Item States
1. Purpose of the document
This document is meant to give insight of how the Repair's system is going to work and how it will integrate into ERP.
2. Overview of Repairs
The repairs system was built to help get a better consistency. The system will provide a better pricing model that is set, allow for more transparency on where the repair product is in the process from the time it comes into the company till the time that it goes to the client.
3. View a Repair
Once logged into Parrot Web.
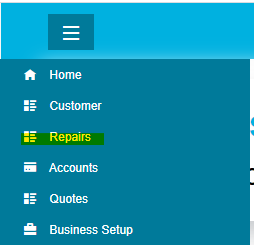
Click on the main menu button in the top left hand corner will reveal the main menu's that you could potentially access.
You will need to find the Menu Item that says Repairs.
Once you click on the Repair Menu; you should be directed to a Welcom page for repairs. On the left hand side, you will now see sub menus. These sub menus will be various options that will only be related to things that can be done within the repair's context.
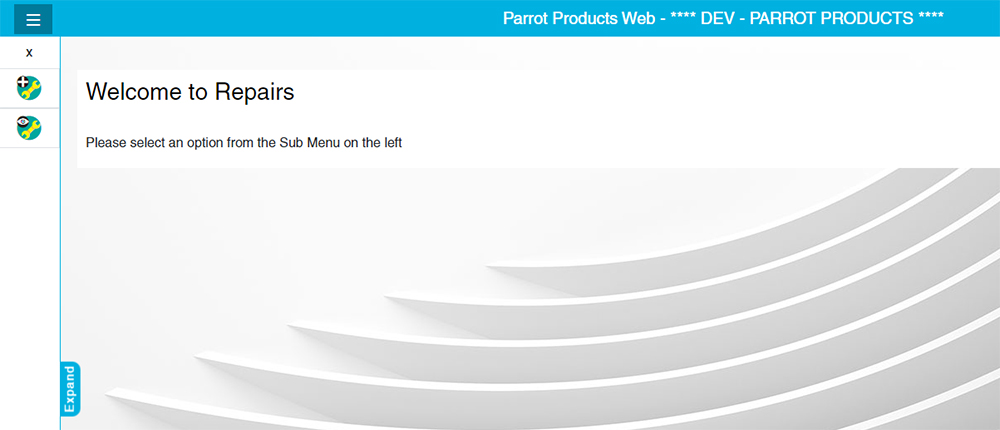
The first option will be 'Create Repair'. This is represented by the wrench icon.(This will be explained in the 'Create a Repair' section.
The second option will be 'View Repairs'. This is represented by the Wrench Icon with an eye symbol. (This will be explained in the 'View Repairs' section.
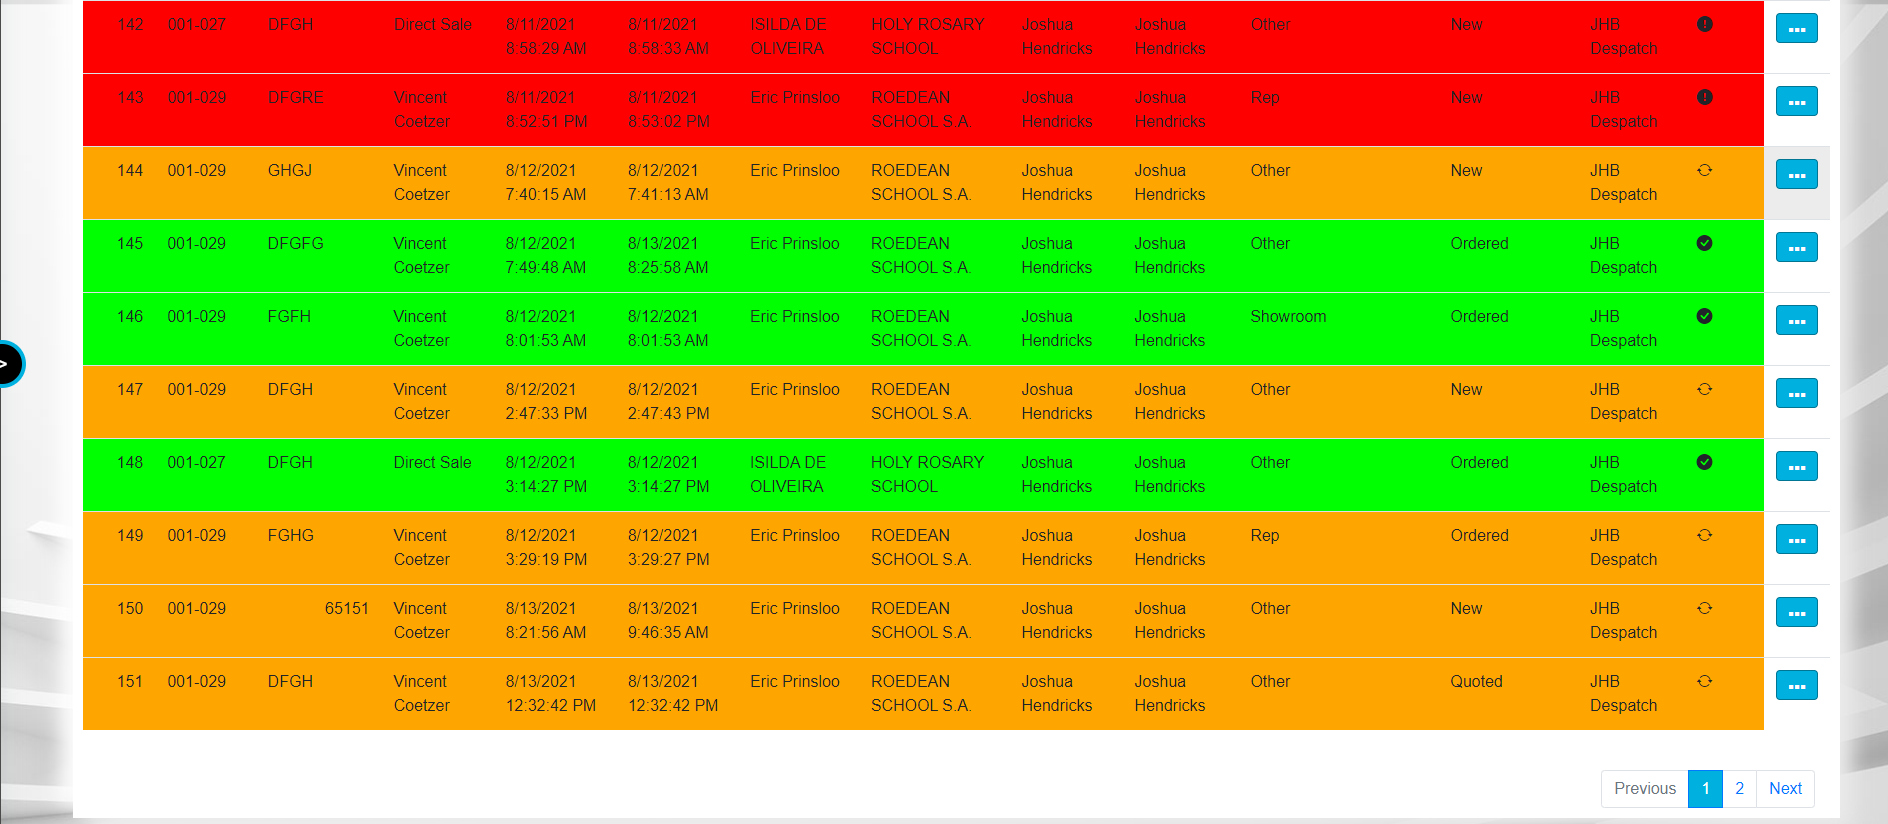
The colours and their meanings:
Red – Means that the repair technician has not done anything with the repair and it still needs to be looked at.
Orange – Means that the technician has done some work on the repair lines and is still busy with the repair.
Green – Means that the repair has been completed and the repair item has been issued to the warehouse (On the order).
Status Image
Means that the repair has not been looked at or seen to yet.
Means that the technician is currently busy with this repair.
Means that the technician has completed his part of the repair.
Clicking on the repair line brings up all the repair lines that have been brought in with the repair.

The details of the repair line will show the stock code, description, quantity and the current status that line item is in and the serial number.
4. View an existing Repair
On the view repairs screen there will be a button at the end of the line.

There will be the following options when clicking the button.

Clicking on the View Button will take you to the repair capture form with all the details linked to the repair.
(See section of How to Capture a new Repair to see what each field means as well as the buttons)
5. Create a Repair

Click on the Create Repair menu option.
This will take you to the Repair Capture Form.
6. How to Capture a new Repair

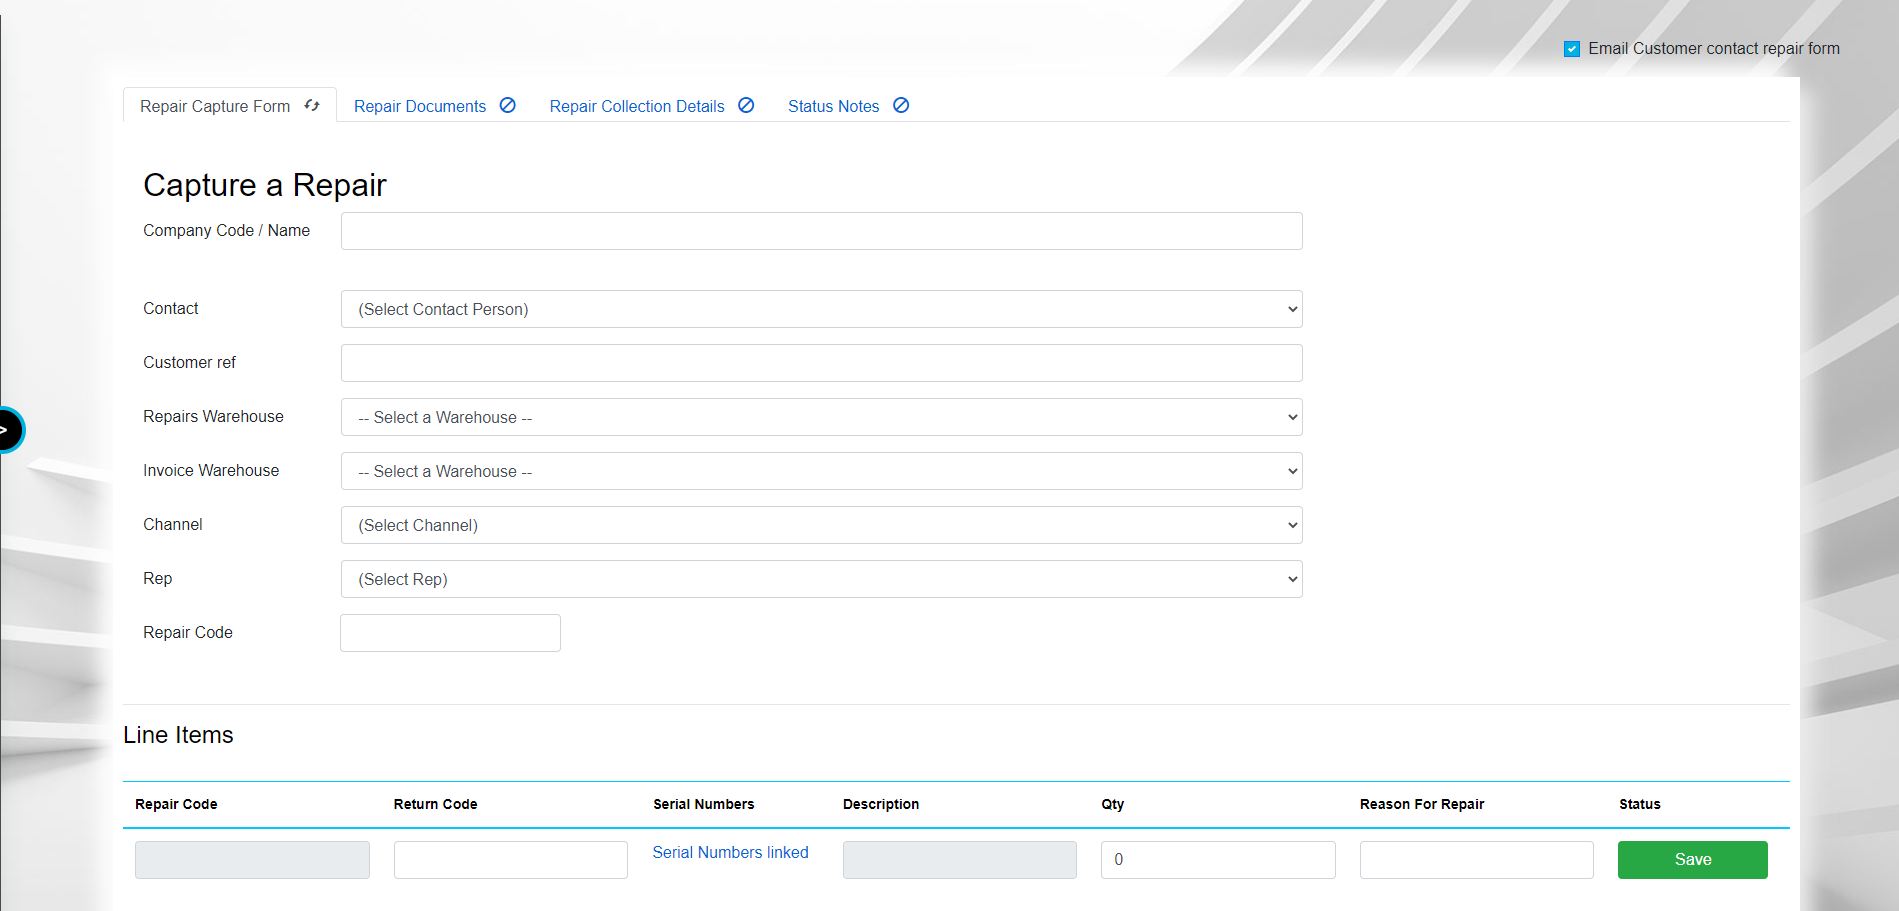
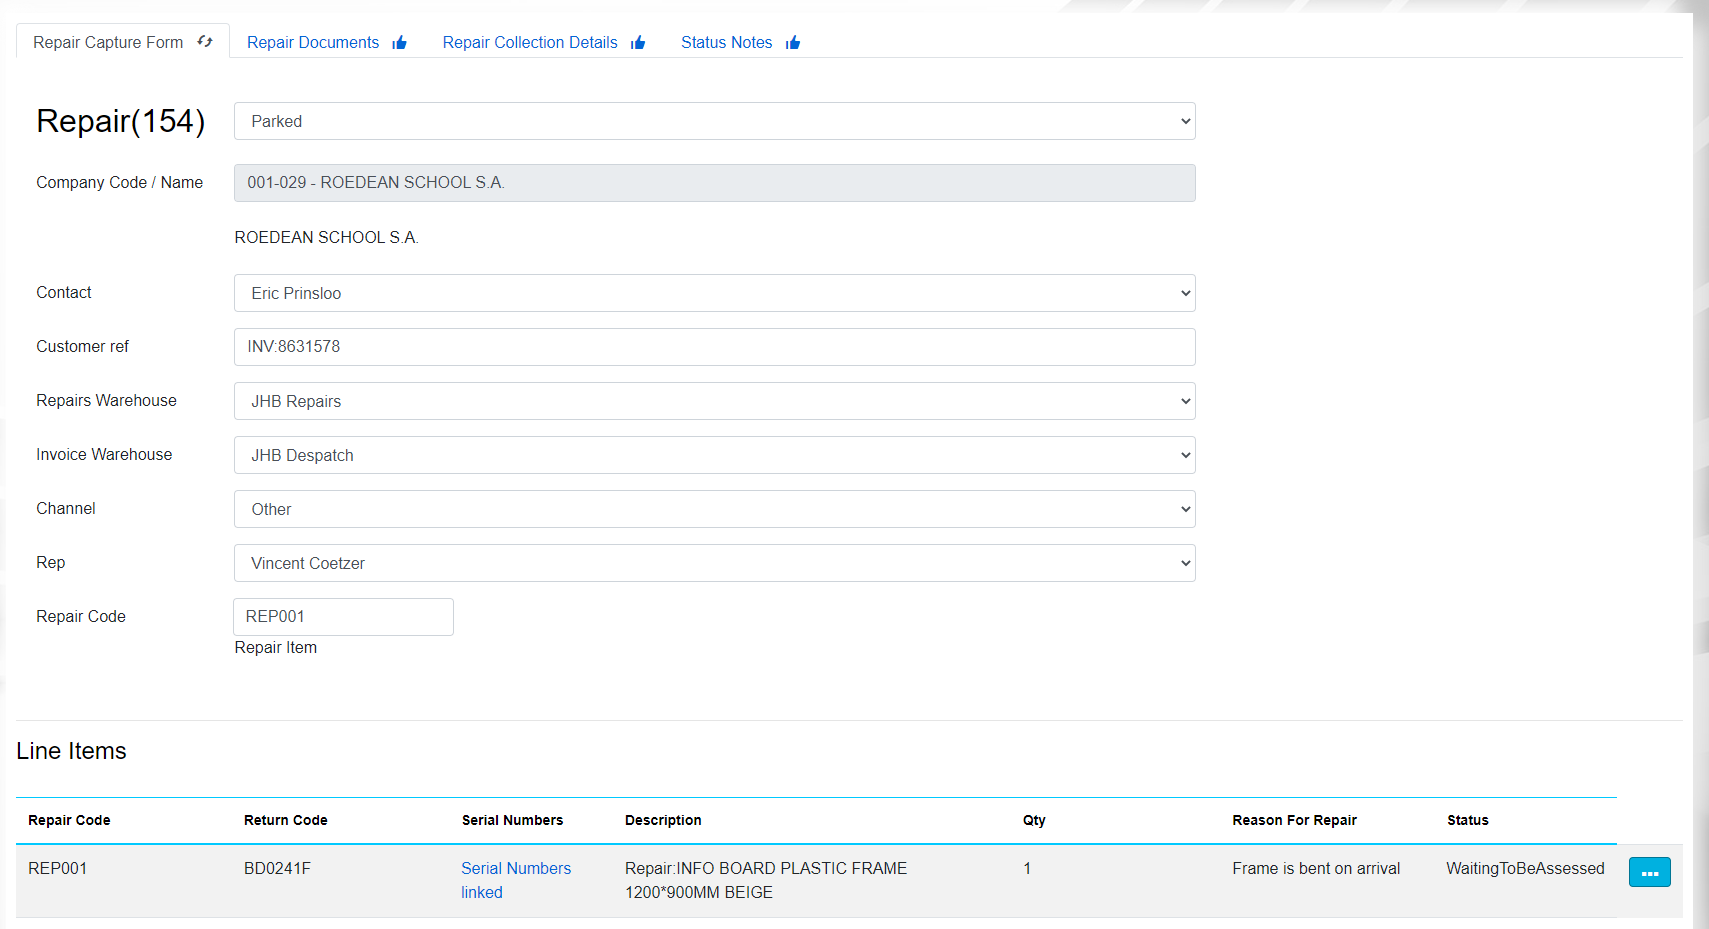
Tab 1 – Repair Capture Form
- The first field is the Customer Code field: This field will accept with the customer code or the customer name. The field will only bring up a list 1 second after the user is idle. What this means that the field will bring up options if the user stops typing for 1 second.
- Once the customer is selected the following fields will be defaulted to what the default for the customer is Contact and Rep.
- If another contact person is the person who requested the repair or there is request to change it then a list of all the contact people that is linked to the customer will be there as part of the drop down list and the same goes for the rep list.
- Customer Ref: this field can be filled out if there is a delivery invoice or if the customer has the original invoice when they bought the product.
- Repairs Warehouse: this field is where the repair is going to take place. This will depend on what warehouse is available to do the repair as well as if the branch is setup to do repairs.
- Invoice Warehouse: this is the warehouse that will go on the order, and will be invoiced out of.
This cannot be changed unless the user is an admin.
- Channel: this is channel that the repair came from.
- Repair Code: this will be the repair product that was setup on ERP (See section called Setup a Repair Product Type). This repair code will be defaulted to all the line items that will come in. If there are different types of repair product codes that will link to specific items. The Repair code will need to be changed before adding the new line item.
The Line Item section
- Return Code: this is the field where the stock code for the actual repair item can be brought in. (Please see how to capture the return code below). This field accepts a stock code, product description, barcode and serial number.
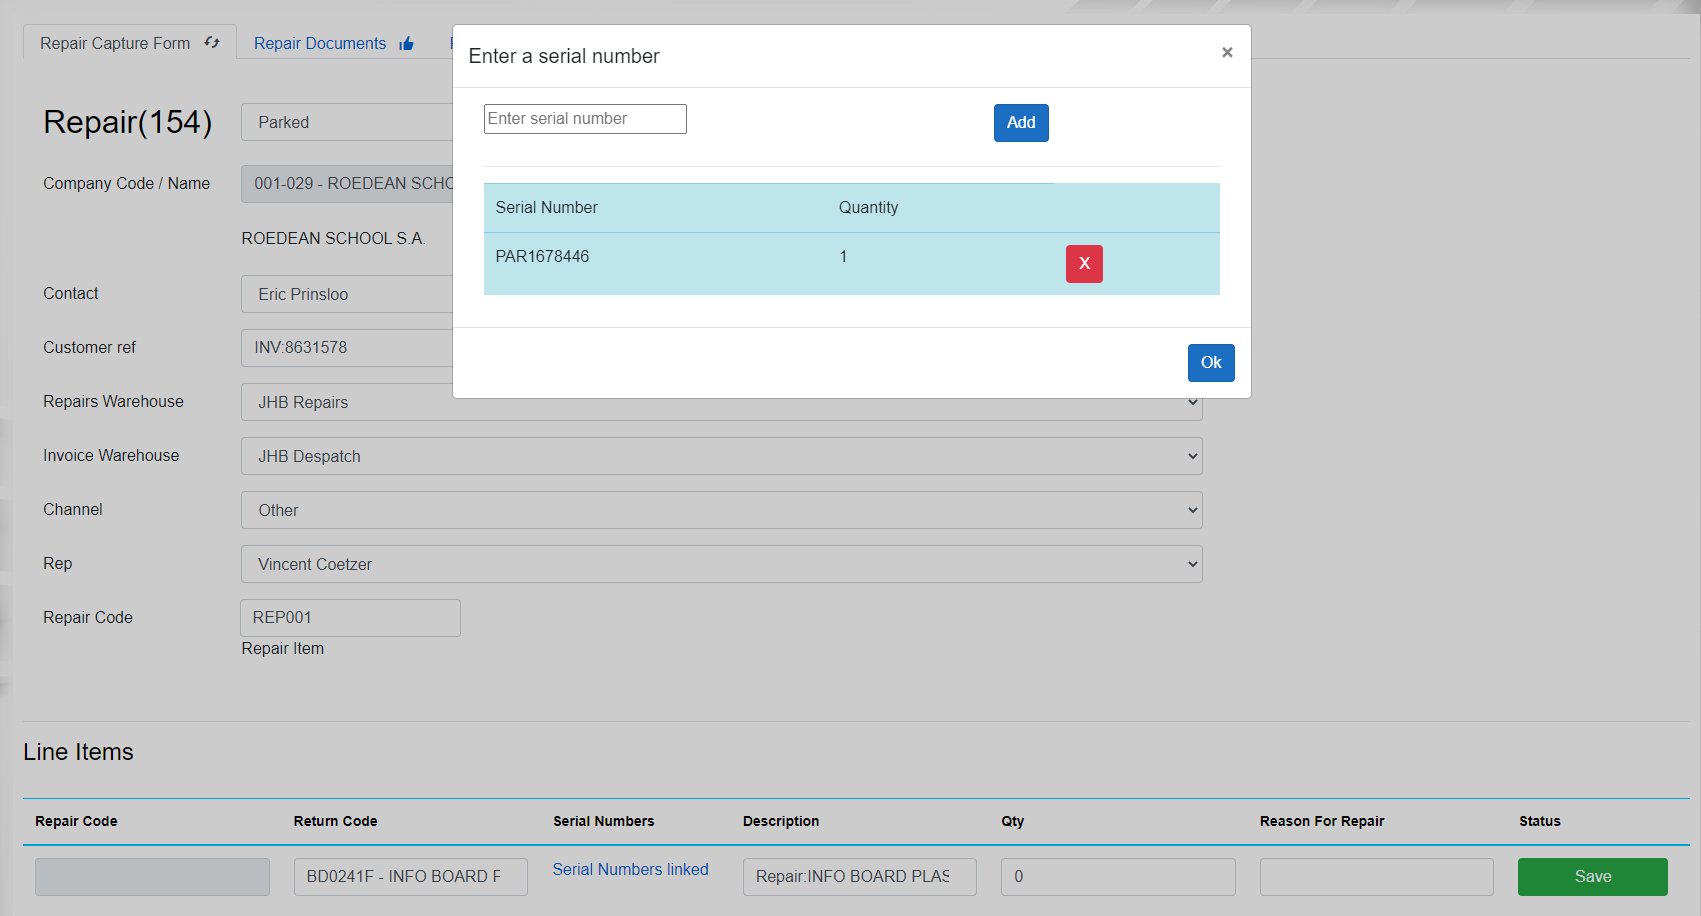
- Serial Numbers: if there is a serial number that you wish to link then the user can click in the field and another popup will show where the user can link the serial number. However, it must be noted that if the serial number is scanned in the Return Code field then it automatically links this to the repair.
- Description: this is the field that will put the Repair description. This is the description that will show throughout the quote, order, invoice and when doing an inter-warehouse transfer. The field is defaulted to “Repair: Product description of the product scanned”.
- Qty: this field is the quantity of how many products are brought in. If a serial number is scanned then the quantity will count how many serials are linked and default it to that, and it cannot be changed. If there are no serials linked, then the field is free form and any number above 0 can be entered.
- Reason for Repair: this field states what is wrong according to the customer.
- Save button will save the line item so that another line can be linked to the repair.
Mandatory Fields
At this stage the following fields are mandatory to create a repair header:
- Company Code / Name
- Contact
- Repairs Warehouse
- Channel
- Rep
Important points to remember:
After selecting a customer, it will automatically fill in the following details:
- Contact - this will be the default contact for the customer.
- Invoice Warehouse - this will automatically be selected and cannot be changed. The selected option will be for the branch that the user belongs to. For Example, if you are in Cape Town, you cannot place a repair for Durban.
- Rep - this will be the default rep for the customer.
- Repair Code - This is the repair product code that exist in ERP.
How to Capture the Return Code?
The return code as stated above can accept the stock code, description, barcode and the serial number. If the serial number is scanned, then it will bring up a popup that will put the serial number that was scanned in and it will also allow for more serials to be linked.
Tab 2 – Repair Documents
This tab will allow the user to attach any supporting documents

However, when attaching the document. The repair will need to be saved. Please see below on steps to save the repair capture form.
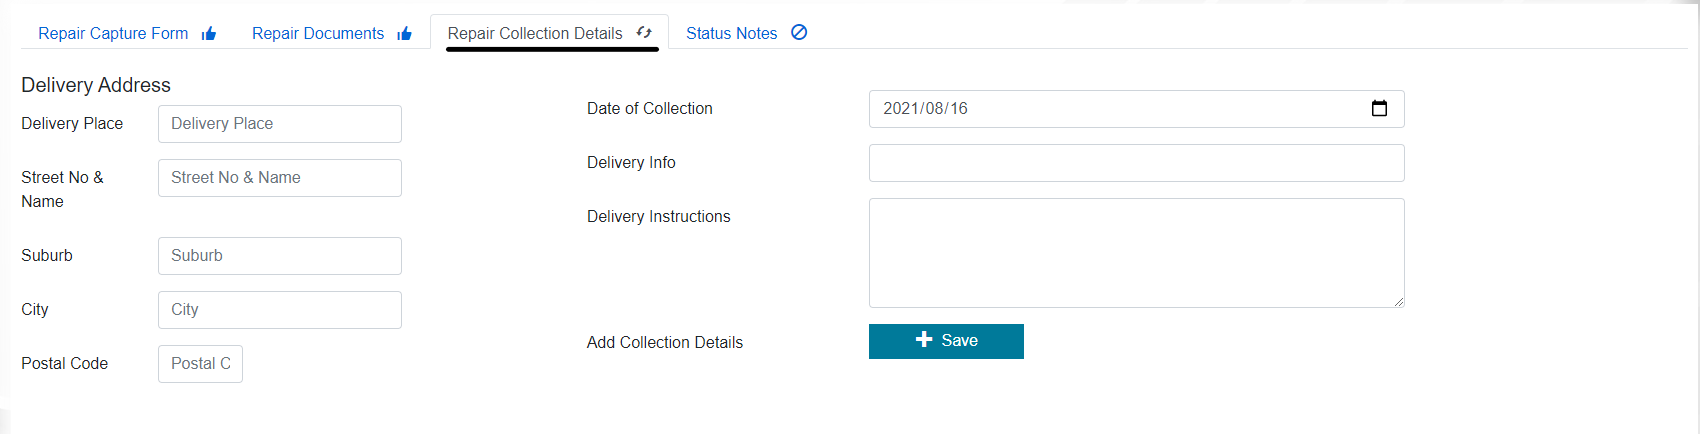
Tab 3 – Repair Collection Details
This tab will default to the customer delivery address and in this field details such as Delivery Instructions and Delivery Information can be filled out.
This tab is going to be part of future development in the pipeline. The idea is that the collection invoice could be done from the repair capture form all in one step.
Tab 4 – Status Notes
This tab shows the status notes of everything that has happened to this repair.
It is also important to know that the repair will need to be saved before notes can be added.

How to save the Repair Capture Form?
As seen in the two images above on how to fill out the repair capture form with a serial number linked.
The form does have certain fields that need to be filled out. As the user fills out the form it will auto validate and the fields that will need to be validated then it will display a message.
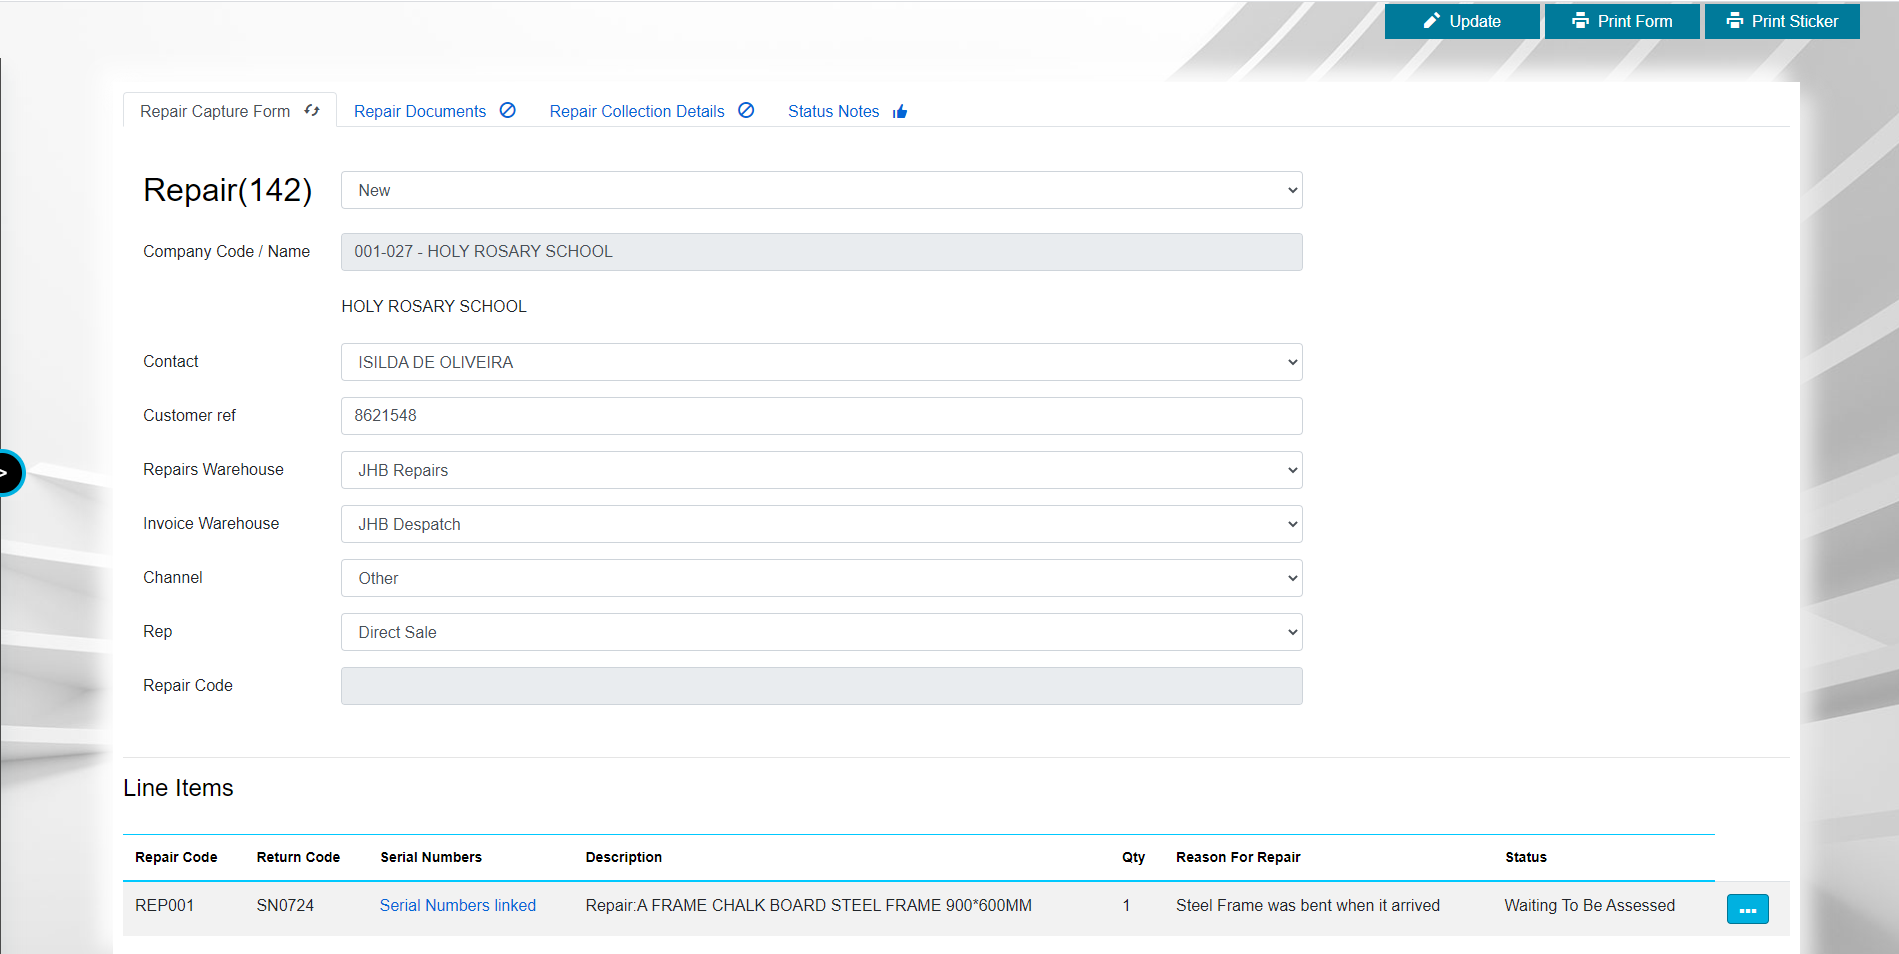
Once the capture form is complete at the top right of the page there will be the following options as seen in the image below.

The Add to Queue button when pressed will perform the following actions:
- Changed the status from “Parked” to “New” – This means that the repair can be worked on and it is added to the repair technician’s queue.
- Create the repair serial numbers and will link it to the repair line. It must be noted that if there is a line item with a quantity greater than 1 the serial will reflect this, i.e. “PAR1234 1/3”.
The Update button is if the user wants to update any of the details on the form.
The Print Form button will compile all the details into a document that can be printed.
The checkbox which is defaulted to ticked which states “Email Customer contact repair form”, it will email the contact listed a copy of the repair form when the “Add to Queue” button is pressed.
After the Add to Queue button is pressed then a new button will appear that says Print Sticker. This will print the repair sticker for the line items with the new repair serial that was generated.
7. Process of Repairing
To get to the repair detail product page (this is the page where the technician will repair each product that was brought in and documents, images and any notes can go against the product). To get to this page please see image below:

Click on the View button, after clicking the button ellipsis dots.
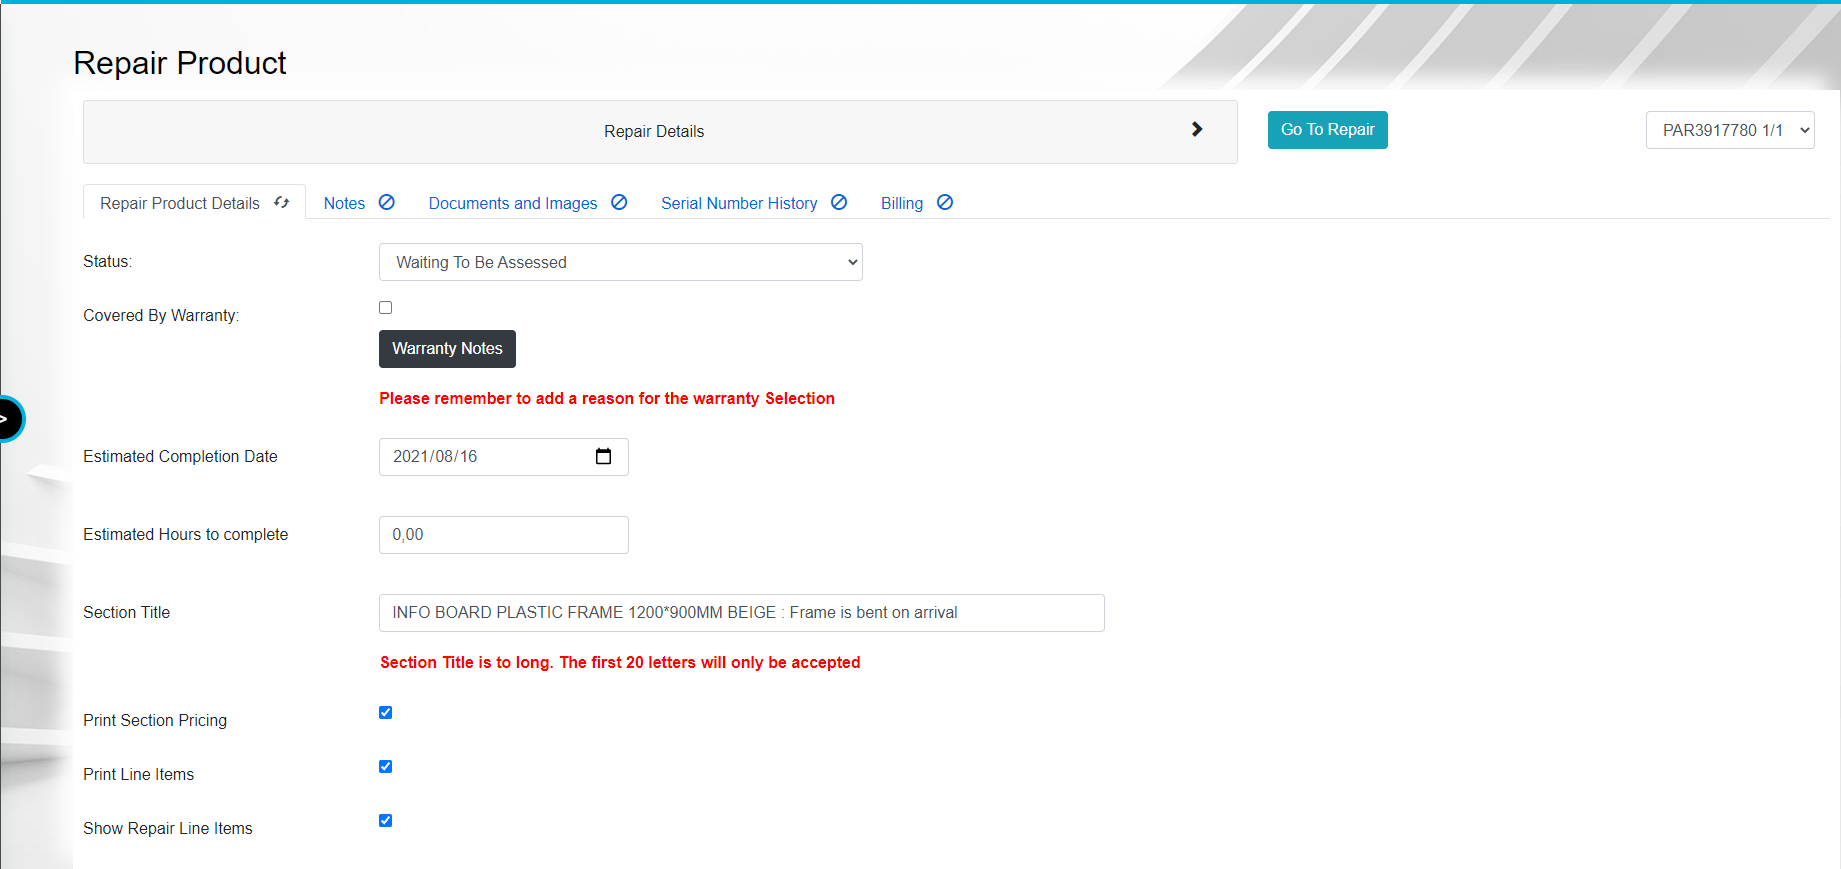
Tab 1 – Repair Product Details
Status: There is a status field which should be changed based on where the repair is. This can be a manually change however it does depend on if the user has the right to. (Please see section on Repair Line Status’s).
Covered by Warranty: This is a checkbox field that will indicate if the item brought in is under warranty. This will need to be confirmed by a manager. If it is under warranty, then there should be no charge. If it is under warranty, then the warranty notes will need to be filled in.
Estimated Completion Date: This field is not used for anything yet, but the idea will be to track if the repairs is on track based in this date.
Estimated Completion Date: this is the date at which the repair is expected to be completed.
Estimated Completion Hours: This field is not used for anything yet, but the idea will be to track if the repairs is on track based on the amount of hours specified.
Section Title: This field will be used to create a section on a sectional quote. All repairs will create sections.
Print Section Pricing: This field will be used to see if the quote should show section pricing.
Print Line Items: This field will be used to show the line items.
Show Repair Line Items: This will be used to show the bill of materials used to fix this repair.
Auto Transfer Stock: This field will redirect you to the ‘Transfer Stock Item to Warehouse’ tab.
Add Item into Warehouse Stock: When this button is clicked it will transfer the actual product into warehouse stock. This should only be used if the customer no longer wants the item and the item has been repaired. This is done so that that the product can be transferred into another warehouse to potentially be sold.
Tab 2 – Notes
This tab will be for any and all notes made for this specific repair item.
Tab3 – Documents and Images
This tab will be for all the documents and images for this repair item.
Tab 4 – Serial Number History
This tab will be for the serial number history of the repair serial that was generated for this repair as well as if there was a repair product that was linked to the line.
Tab 5 – Billing
This tab is where the bill of materials will need to be inserted. In here the stock code or the description can be entered and once found the quantity will be changed as well. If the user has the right, then the Product description as well as the cost price and selling price can also be changed. The user will enter it one line at a time and click the save button when the user is done.
Tab 6 - Repair Report
This is a full summary of everything that has happened on the entire repair. From header to all the line items.
Tab 7 - Transfer Stock Item to a Warehouse
This is where the user can do a transfer of the item when it gets added back into stock via the button on the Repair Product Details called 'Add Item to Stock'. The user can then transfer it to any warehouse that they want to.
Create a Bill of Materials
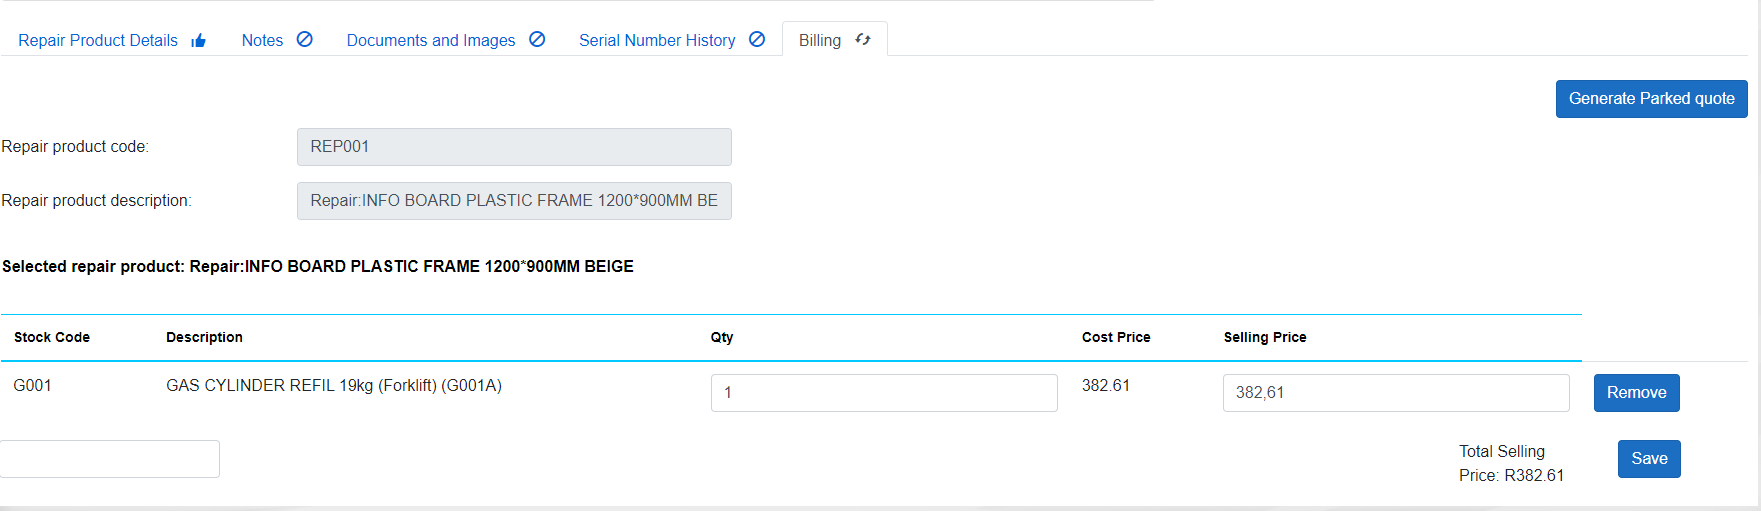
When the technician is done adding the bill of materials then the user will click the button “Generate Parked Quote”. This will generate a parked quote. That the user will follow in ERP to create the normal quote as well as an order.
Once the button is clicked then another button that will say Preview Parked Quote will appear as well, where the user can preview what the parked quote looks like.

It must also be noted that the repair status will move automatically and there would not be a need to change the statuses manually.
After the quote has been converted to an order then the technician must change the status to “WIP - Repairing” this will create a job in ERP as well as if on the bill of materials then it will create a requisition for the raw materials.
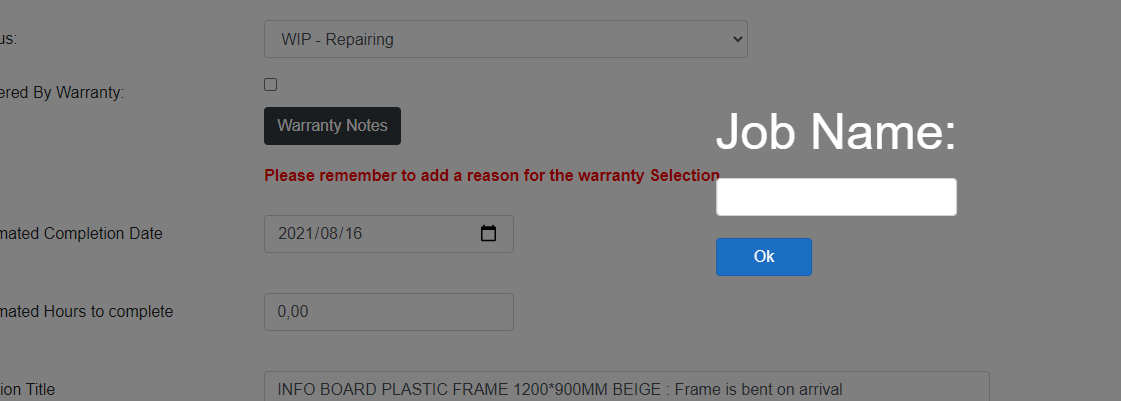
The technician will need to enter a job name.
When the technician will change the status to Repair Completed when the job is done.
Once the Repair is completed then it will then need to be inter-warehouse transferred from the repairs warehouse to the invoicing warehouse.
8. Transfer it from Repairs Warehouse to despatch
The normal way to do an inter-warehouse transfer will remain in place. The repair serial number will be scanned for the issue and it will be received how all transfers are done.
9. Setup a Repair Filter
On the View Repairs screen there is an image of a medal on the top left of the page.

Clicking the add button will enable the user to add a new repair filter.
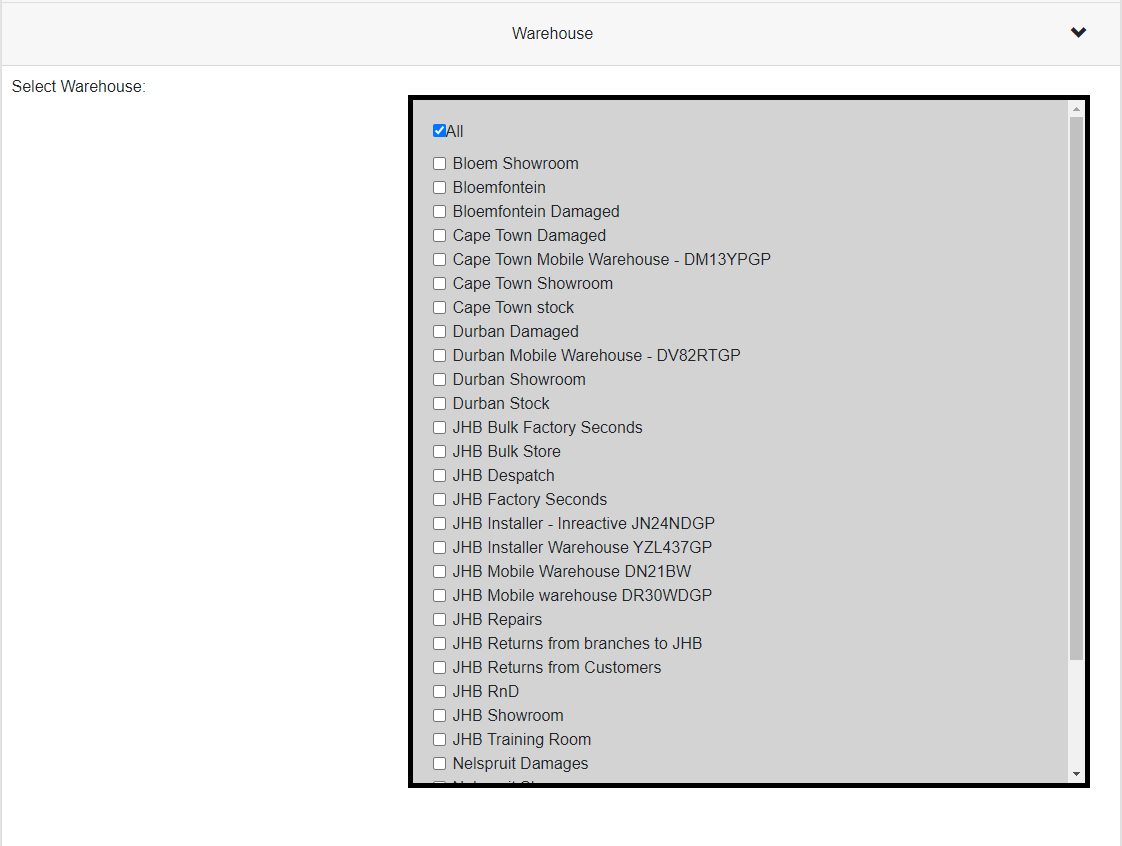
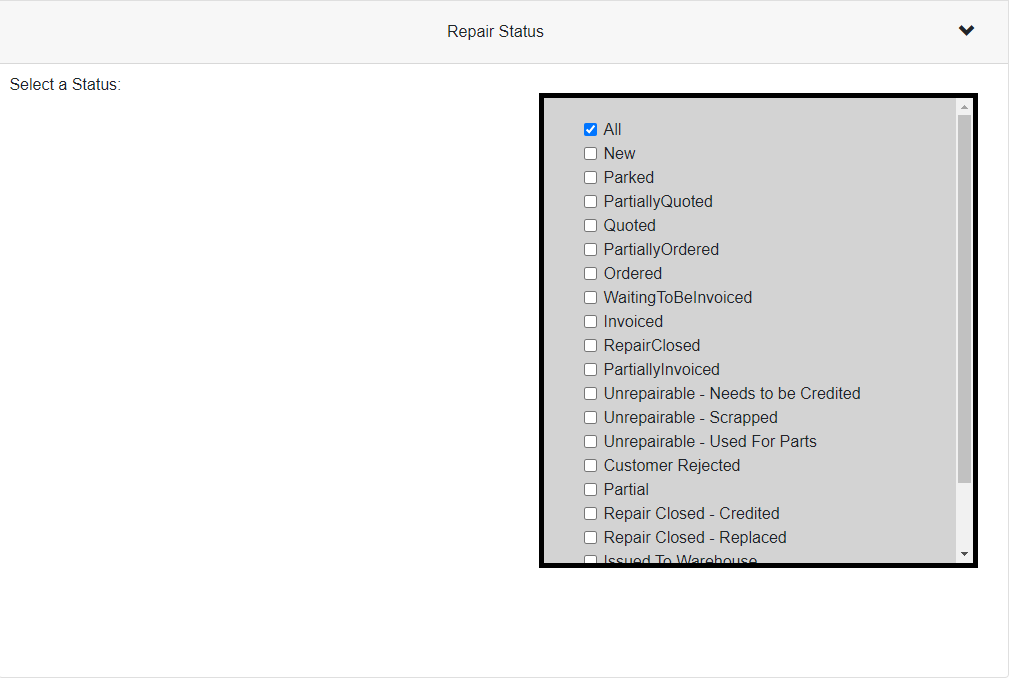
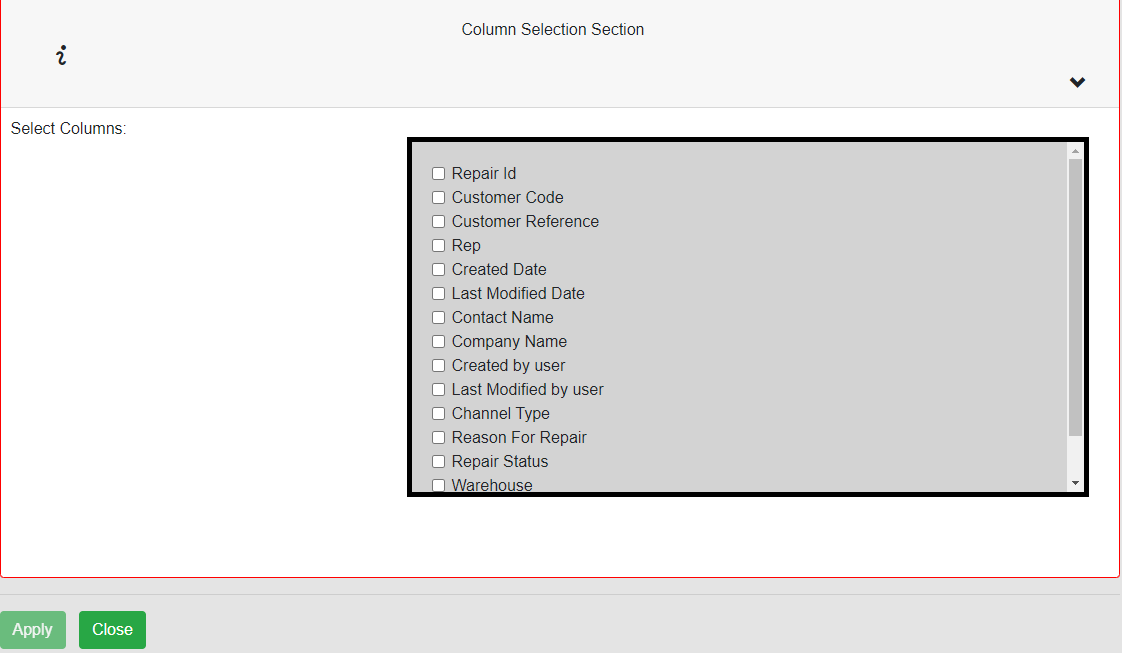
Under the following section the user will be able to filter on the following:
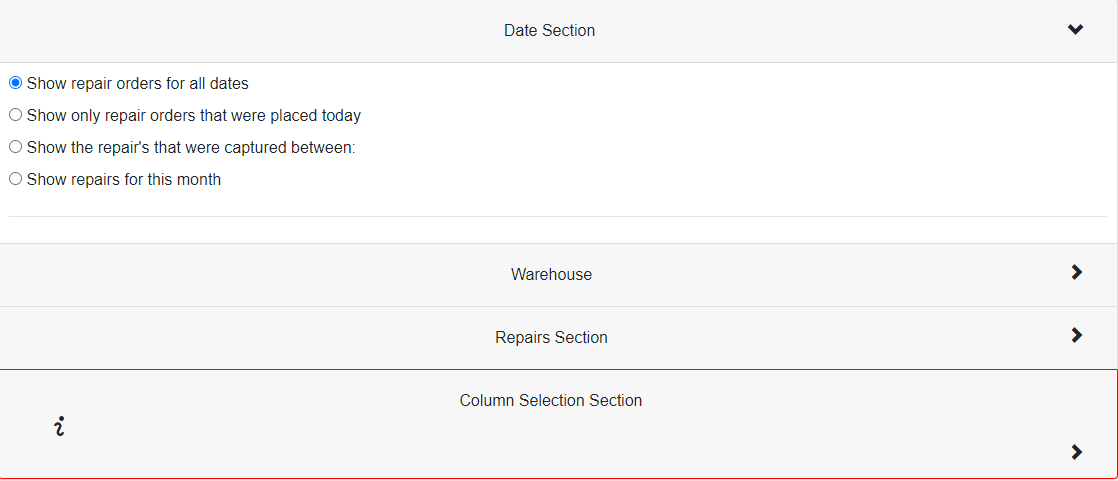

Finally, there will be a column selection that will need to happen for all the columns that the user wants to see.
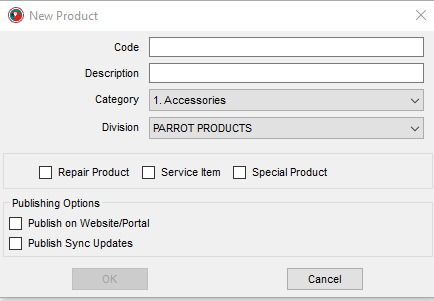
10. Setup a Repair Product Type
The same process as normal when creating a product however the user will select Repair Product as an option.
11. Repair Header Status
This section will describe all the repair header states.
New: This indicates that the repair can be worked on.
Parked: This indicates that the repair details are, not complete and the repair serial has not yet been generated.
Partially Quoted: This indicates that the repair has line items in a different state where at least one-line item is quoted.
Quoted: This indicates that all line items on the repair have been quoted.
Partially Ordered: This indicates that the repair has line items in a different state where at least one-line item is ordered.
Ordered: This indicates that all line items on the repair have been ordered.
Waiting to Be Invoiced: This indicates that the repair is complete and waiting to be invoiced.
Invoiced: This indicates that the repair has been invoiced.
Repair Closed: This indicates that the repair is complete and has been sent to the customer.
Partially Invoiced: This indicates that the repair has line items in a different state where at least one-line item is invoiced.
Unrepairable - Needs to be Credited: This indicates that the repair cannot be fixed or the customer wants a credit.
Unrepairable – Scrapped: This indicates that the repair cannot be fixed and the repair item will be thrown away.
Unrepairable - Used for Parts: This indicates that the repair cannot be fixed and will be stripped for usable parts.
Customer Rejected: This indicates that the customer rejected the repair.
Partial: This indicates if multiple products are in different states.
Repair Closed – Credited: This indicates that the repair is closed and has been issued with a credit note against the invoice.
Repair Closed – Replaced: This indicates that the repair has been replaced.
Issued to Warehouse: This indicates that the repair is issued to the warehouse.
Received into Warehouse: This indicates that the repair has been received into the warehouse.
On Hold: This indicates that the repair is on hold. A reason in the status notes should be provided.
Deleted: This indicates that the repair has been deleted.
Issued to Factory: This indicates that the repair has been issued to factory.
Received into Factory: This indicates that the repair has been received into the factory.
12. Repair Line Item States
The section will describe all the states that repair lines can be in.
It is important to note that the customer will receive an email every time the line item status changes.
Waiting to Be Assessed: This indicates that the repair has not been looked at nor has it been accepted to the WIP (Work in Progress).
Accepted into WIP: This indicates that the technician has accepted the repair item into WIP and is currently looking at it.
Quoted: This indicates that the repair line has been quoted.
Busy Quoting: This indicates that the repair line is still in the process of being converted into a quote.
Ordered: This indicates that the repair line has been ordered.
WIP – Repairing: This indicates that the repair technician has gotten the go ahead to work on the item.
Repair Completed: This indicates that the work on this repair item is complete.
Unrepairable - Needs to be Credited: This indicates this repair item needs to be credited.
Unrepairable – Scrapped: This indicates that the repair item needs to be scrapped as it cannot be fixed.
Unrepairable - Used for Parts: This indicates that the repair item cannot be fixed and will be used for parts.
Customer Rejected: This indicates that the customer rejected this repair item.
Issued to Warehouse: This indicates that the repair item has been issued to a warehouse.
Received into Warehouse: This indicates that the repair item has been received into a warehouse.
Unrepairable - Used for Parts: This indicates that the repair item cannot be fixed and will be used for parts.
Picked: This indicates that the repair item has been picked.
On Hold: This indicates that the work to be done on this repair item is on hold.
Issued to Factory: This indicates that the repair item has been issued to the factory.
Needs a replacement / Replaced: This indicates that the repair item needs a replacement quote.
Added Product to Warehouse Stock: This indicates that the repair item is no longer a repair but will be a product that has been added to the warehouse to be sold as stock.
Received into Factory: This indicates that the repair item has been received into the factory.