Back
Contents
1. Order Control
1.1 Order Control Overview
1.2 Order Control Filters
1.3 Order Options
1.4 Release Order
2. Order Picking 2.1 Order Picking Overview 2.2 Selecting a Customer Order to Pick 2.3 Picking a Customer Order 2.4 Pricing Labels or Loading Sheets 2.5 Close or Resume Later 2.6 Picking Setup
1. Order Control
1.1 Order Control Overview
Order Control is available from the Order Control button in the Customers tab.
The Order Control is used to view and manage orders. Different filters can be set up to specified the orders to view depending on the order status etc. A filter can be set up to view orders that will be picked and show the order that they will come up for picking. Other filters, such as all unpaid COD orders can also be set up to get an easy overview of all your orders.

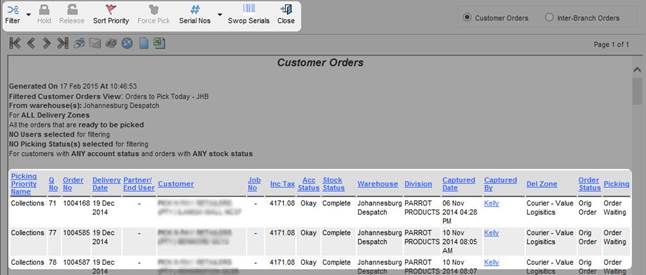
The Order Control screen will list all orders and give you multiple options to manage the orders listed. Actions available in the Order Control main menu:
| Filter |
Change the current filter that is applied when loading the list of orders by clicking on the down arrow next to the Filters button.
Create a new filter or modify any existing filters by clicking on the Filter button. |
| Hold |
When an order is selected, the Hold button will be enabled. Clicking on the Hold button will place the order on hold. |
| Release |
If the selected order is currently on hold, clicking on Release will remove the hold from the order |
| Sort Priority |
This will allow you to move the order up or down the Picking Queue. This is the sequence that orders will automatically come up for picking. |
| Force Pick |
Force pick will force the order to come up for picking the next time an order is requested for picking. |
| Serial No's |
This is a report on a specific serial number, showing the status and movement for a serial number. |
| Swop Serials |
Swop Serials allows 2 serial numbers to be swopped out, e.g. if one product is damaged and needs to be swopped with another. |
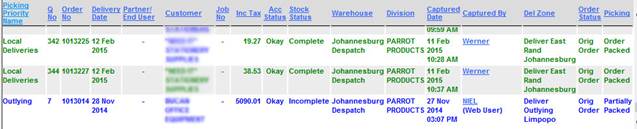
Orders that have been picked will show as green in the list. If an order has been picked and also selected in the Invoice Control, the order will show as green, but with blue text in the Customer name.
An order that has only been partially picked and then selected in the Invoice Control will have the whole row show in blue.
1.2 Order Control Filters
When opening the Order Control screen, orders will load using the previous filter that was selected. You can then go through the orders or you can select another filter and load orders for that filter criteria.
To edit an existing filter or create a new one, click on the Filter button. The below screen will open, allowing you to choose from available orders to view and then select additional filters. To create a new filter, click on New view. You will be prompted for a name and can then start to create the filter that you required.
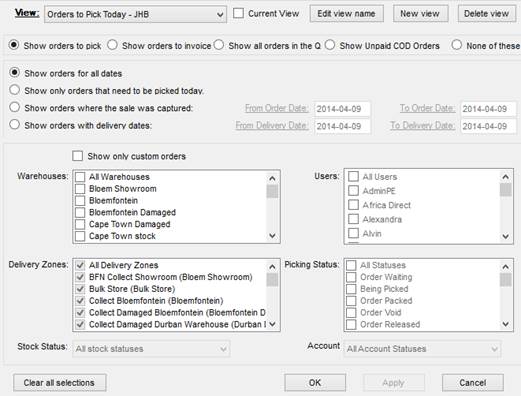
Views that are available are:
| Show orders to pick |
This will show all orders that still need to be picked in the order that they will be picked. This will only show order in Order Waiting status that are not on hold and that have stock allocated to it. |
| Show order to invoice |
This will show all orders that have been completely picked and is ready to be invoiced. The status for the orders should be Order Packed or Partially Packed in order to show up in this queue. |
| Show all orders in the Q |
This will show all the orders that were picked and also that still needs to be picked. |
| Show Unpaid COD Orders |
This will show all the COD orders that has not yet been fully paid. The orders will be in Waiting For Payment status |
| None of these |
Select this option if you do not want to filter on any order status, and only want to use the additional filters such as dates, warehouse etc. |
Besides the order views that are available, you can also filter on the order date (Order placed and delivery dates), the warehouse, delivery zone, and for some of the views you can select a user and picking status.
1.3 Order Options
To access additional options for a specific order, you can right click on the order and select any of the options available in the right click menu.
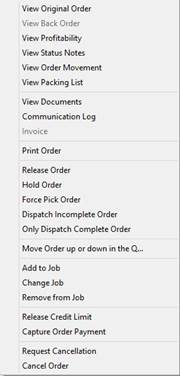
The first options is simply to view documents related to the order that’s been selected, such as the original order, packing list etc. You can then also view any documents linked to the order, as well as the event log (communication) for the order.
Release and Hold Order is similar to the main menu hold and release. It will simply release the order or place it on hold. More info on releasing an order below.
Force Pick Order will move the order up the picking queue and will allow the order to come up for picking when the next order is requested. This will also ignore the stock status for the order and force the order to come up for picking.
Dispatch Incomplete Order and Dispatch Complete Order sets the option to be able to pick the order without all stock being available, or the order has to have all stock available before it can be picked.
Release credit limit will allow the order to be processes even if the customer’s credit limit has been reached.
Capture Order Payment will allow the user to capture a payment against the order. This is only for COD customers / orders. If the full payment has not been captured, then the order will not come up for picking.
Request Cancellation will set the order in Cancel Requested status, but will not cancel the order yet. Users with the correct permission can then view the order and Cancel the order.
Before an order is cancelled, any items picked against the order has to be removed. To do this, click on Release Order.
1.4 Release Order
When an order is in a status that’s preventing it from moving on to the next status in the cycle, clicking on release order will release the order and allow it to continue. When an order is in Waiting For Payment status, releasing the order will change the status to Order Waiting. When an order is on Hold, releasing the order will change it back to the previous status.
When an order has already been picked and is then released, the status will go back to order waiting and all the items picked against the order will be removed.
2. Order Picking
2.1 Order Picking Overview
Picking is used to fetch all the stock on an order and group it together and place it in the correct location to be invoiced and delivered. Picking also tracks product serial numbers and product quantities and assists in getting the correct products to the customer.
The pickling screen is available from the Customers tab when clicking on the Order Picking button.

2.2 Selecting a Customer Order to Pick
There are two ways to pick orders, either by having orders coming up automatically or by specifying the order number to pick.
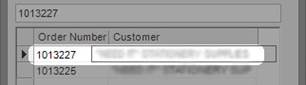
To specify an order number to pick, enter the order number in the Order No field shown below and click on the Go button. If the user has permission to specify the order no to pick, the order will come up for picking, else a prompt will come up for a user with permission to enter their username and password. To automatically load orders to pick, simply click on the Start Picking button. You can also change the Warehouse to load orders from and the next order will load.

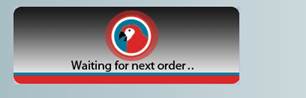
When clicking on the Start Picking button and there are no orders available to pick, a Waiting for next order message will come up and will periodically check if there are any new orders to pick. When an order becomes available, it will then be loaded.
When an order loads, the order details will be displayed as shown below. The order no, customer, delivery zone, as well as any delivery instructions that was entered for this customer.

2.3 Picking a Customer Order
Once the order has loaded, all the products for this order will be displayed on the left of the screen. Depending on how picking has been set up, it might be required to scan a serial number for some products and a product barcode for products that do not require a serial number.
Items that’s been picked will also be saved as they are placed in a parcel. This enabled the application to be closed and opened again without losing any items selected and you can resume from where you left off.
As shown below, product 1 requires a serial number to be scanned and product 2 requires a product barcode. The image on the bottom right hand side shows if a serial number or product barcode is required.
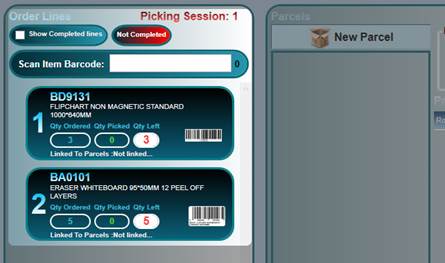
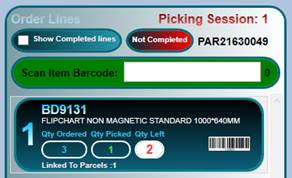
To pick items that require serial numbers or barcodes to be scanned, click in the Scan Item Barcode textbox and start scanning the products. As an item is scanned, the quantity Picked and Left to pick will be changed, and the product will be moved to the right of the screen. Continue scanning until the product is completely removed from the left of the screen.
If picking is not set to require serial number or barcodes to be scanned, you can simply click on a product and drag it to an existing or New Parcel on the right. You can also scan a barcode for the product, but it is not mandatory.
When scanning or dragging products, they can either go into a New Parcel or you can add multiple items into a single parcel.
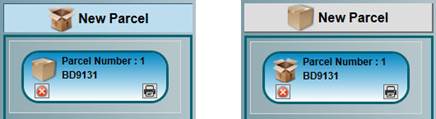
To add every item scanned to a new parcel, click on the New Parcel button. The icon for the button will show as an open box. To add scanned items to an existing parcel, click on the box icon of the parcel. This will change the New Parcel button to a closed parcel and change the parcel icon to an open parcel.
Items being scanned will always be added to the item with the open parcel icon. When dragging items, you can simply either drop the item on the New Parcel button or on an existing parcel.
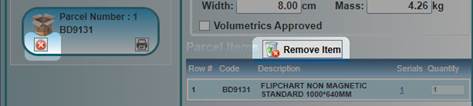
If there is a single item in a parcel, the parcel dimensions will automatically be populated. When adding more items to the parcel, it will change to 0 and you can then go and change the details as required.

To remove items scanned to a parcel, click on the item on the right and then click on the Remove Item button. To remove an entire parcel, click on the delete button on the parcel.
Once all the items have been picked, click on the Complete button. The items will then be saved and the order status changes to Order Packed. You can also click on the Complete button before all the items have been picked, the order status will then change to Partially Picked.
When clicking on Complete, labels and a packing list will be printed if the Print Labels and Print Loading Sheet options are selected. If the Print Loading Sheet option is selected, you can choose to print parcels on the loading sheet by selecting the Show Parcels on Loading Sheet option.

2.4 Printing Labels or Loading Sheets
As explained above, a label and loading sheet can be printed when completing the picking for an order. Labels and loading sheets can also be reprinted at a later stage, simply click on the Reprint Labels and View Loading Sheet buttons.

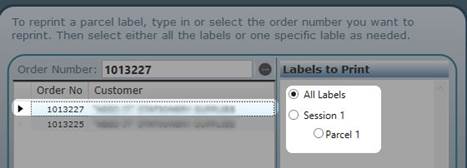
When clicking on the Reprint Labels button, a prompt will open where you can select the order number to reprint the labels for, and then select the labels to print. When the correct labels are selected, click on the Print button.
Clicking on the View Loading Sheet will open another prompt to select the order number. Once the order is selected, click on OK to print the loading sheet.
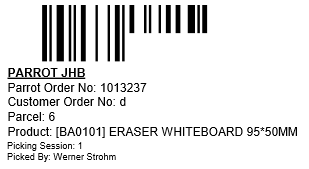
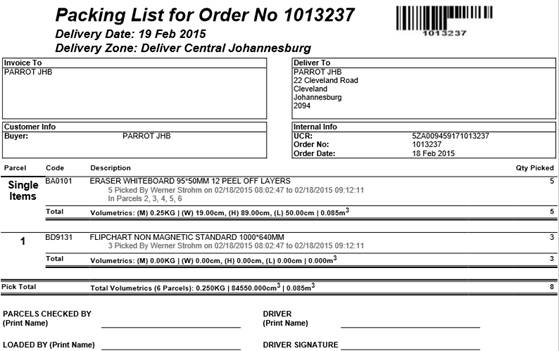
The packing list will show what products were picked in what parcels. Parcels with only a single item will show in the Single Items parcel. If there are more than one item in a parcel, it will show in the relevant parcel number.
2.5 Close or Resume Later
When busy picking an order and clicking on the Close button, the user will be prompted to Close or Resume Later.
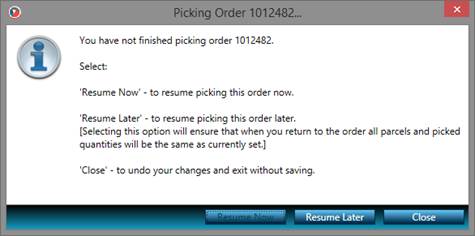
The Resume Later option will save the picking session and allow the user to resume from where they left off. It will also reserve the order for the user and cannot be picked by any other user until it has been release.
Clicking on Close will close the picking session and remove any items picked. Any other user can then get the order for picking.
Resume Now will simply close the prompt and allow you to continue picking the current order.
2.6 Picking Setup
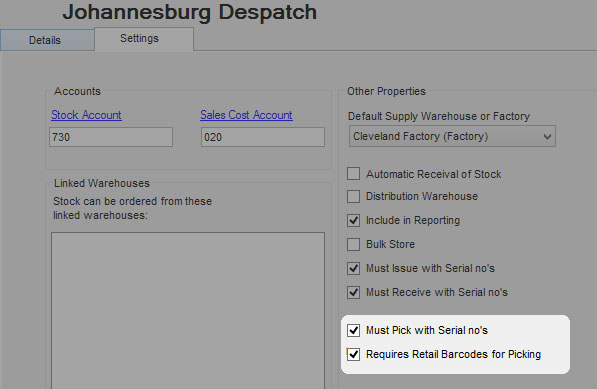
The setting to require serial number to be scanned for products and barcodes for products that do not require serial number can be set for each warehouse. To do this, click on Branches in the Setup tab.

In the screen that opens, select the branch and then select the required warehouse.
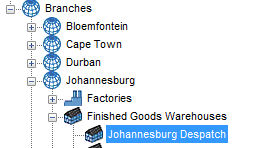
When the warehouse is selected, click on the Settings tab on the right hand side. The two settings for picking is called Must Pick with Serial nos’s and Require Retail barcodes for Picking