Back
Contents
1. Invoicing
1.1 Invoicing Overview
1.2 Trip Sheets
1.3 Creating a new Invoice
1.4 Creating a new Invoice from the Sales Order
1.1 Back Orders
1.2 Delivery Documents
1.3 Using the invoice Control screen
1. Invoicing
1.1 Invoicing Overview
The Invoices screen allows you to invoice products or services to customers. You can create an invoice by going to the invoice screen, select the customer to invoice and enter the products and quantity to invoice. You can also create an invoice from any existing order that has been created.

1.2 Trip Sheets
When doing multiple invoices that will be sent out with a driver, a trip sheet can be created and each invoice added automatically as they are created.
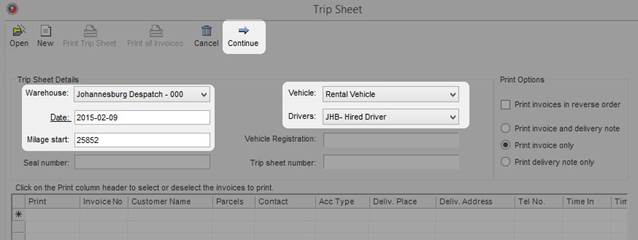
To use trip sheets, click on the Trip Sheet button in the Invoice screen. A screen will open where you can enter the vehicle details and create a new trip sheet, or select an existing trip sheet to add more invoices to.
In the Tip Sheet screen, select the Vehicle and Driver, and complete any additional information and click on the Continue button.
When there is an active trip sheet, the Trip Sheet button in the Invoice screen will show as pushed or clicked

When a trip sheet is selected, the option to not print invoices will be taken into account and allow you to print all the invoices at once from the trip sheet when you are done invoicing.

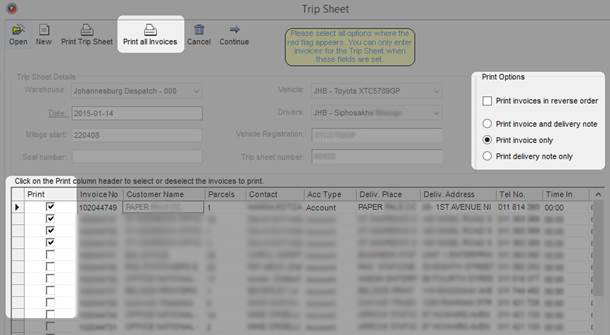
To print multiple invoices, open the Trip Sheet (either from the Invoice screen, or slicking on the Load Vehicles button in the Customers tab) and select the invoices that will be printed.
Select a print option on the right of the screen and select or deselect any invoices to print (clicking on the Print column header will select or deselect all the invoices), and then click on the Print All Invoices button at the top of the screen. All the selected invoices will then be printed out.
1.3 Creating a new Invoice
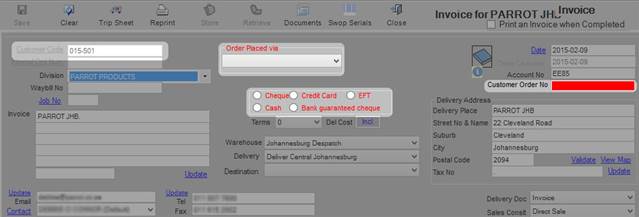
To create a new invoice, click on the Invoices button in the Customers tab and either click on the Customer Code to search for a customer or enter the customer code and press Enter. Once the customer info is loaded, complete any of the required fields shown in red and enter or change any of the additional details that will go onto the invoice.
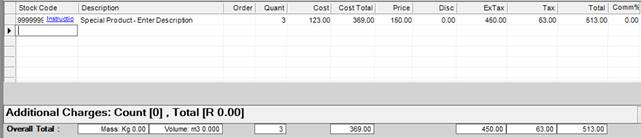
Once all the information has been entered, the products and quantities required on the invoice can be added by either entering the product code in the grid, or searching for the product and selecting it from a list.
Similar to Sales Orders, sections can be created for an invoice. Refer to the Sales Orders user manual for more information on sections.
After all the info has been captured for the invoice and all products added, click on the Save button to create the invoice.
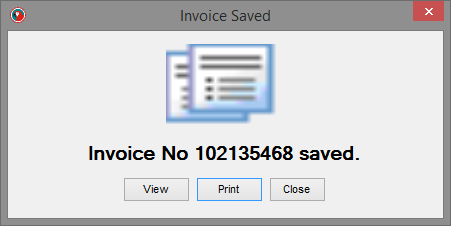
When the “Print an Invoice when Completed” option is selected (or no trip sheet was created), a message will appear when the process has completed prompting to View or Print the invoice, or cancel and go back to the invoice screen in order to capture another invoice.
When the “Print an Invoice when Completed” is not selected, no message will appear and you can continue to create a new invoice straight away.
1.4 Creating a new Invoice from a Sales Order
Creating an invoice from an existing sales order is similar to creating an invoice by selecting a customer. Instead of searching or entering the customer code, enter or search for an order number and press Enter.
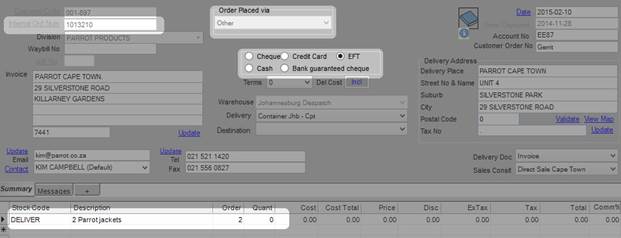
When doing an invoice from a Sales Order, all the information required will already be completed. This information comes from the data entered when the Sales Order was captured.
All the products that were added to the Sales Order will also be loaded automatically with the correct quantity ordered. In the example above, the quantity is showing 0 and will have to be changed to 2 (this is the quantity that will be invoiced). If the order that was selected has been picked in the Picking screen, then the quantity picked will automatically be displayed in the quantity to invoice.
If all the quantities have been checked and are correct, you can click on Save to save the order as you would when creating an empty invoice.
Orders can also be selected for invoicing by expanding the Available Orders for Invoicing section on the right of the screen. All orders that’s been selected in the Invoice Control screen will be listed and you can right click on the order or click and drag the order to the Internal Ord Num field in the invoicing screen.
1.1 Back Orders
It’s possible to invoice a Sales Order where the quantity to invoice differs from the quantity that was ordered. When the invoice is then saved, a back order will be created for the customer with the quantity for the products as the difference between what was ordered originally and the quantity that was invoiced.
For example, if a product was ordered with a quantity of 10 and only 8 were invoiced, then a back order will be created with a quantity of 2 for that product.
Items that were invoiced where the quantity equals the quantity ordered will not appear on a back order.
1.2 Delivery Documents
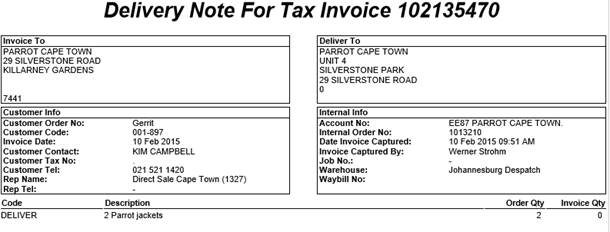
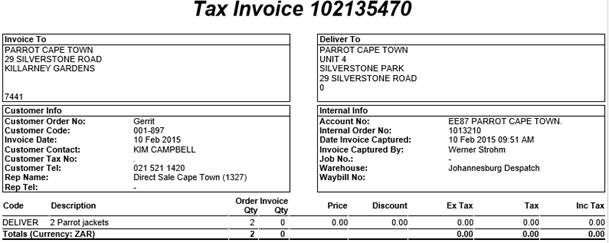
There are two types of delivery documents that can be printed when completing an invoice, Invoice and Delivery Note. The type of delivery document can be selected by changing the Delivery Doc option as shown below.

Below are examples of a Delivery Note and an Invoice. The main difference being that the Invoice will show detailed pricing information where the Delivery Note will only show the quantities.
1.3 Using the Invoice Control screen
The Invoice Control screen is used to select orders that will be invoiced and sort them into the correct order to be invoiced. This is useful to set the order that stock should be loaded into a vehicle, the last item to be delivered should be loaded into the vehicle 1st and the 1st item to be delivered loaded last.
To access the Invoice Control screen, click on the Invoice Control button in the Customers tab.

When the Invoice Control screen opens, select a delivery zone to select order from and then select the vehicle that will be loaded. Orders will only be available for selection if the order has been picked or if the order only have service items.

When a Delivery Zone is selected, all available orders that can be invoiced will be loaded. To select an order for invoicing, either drag the order from the left to the right or scan the order number in the Scan Order No textbox.
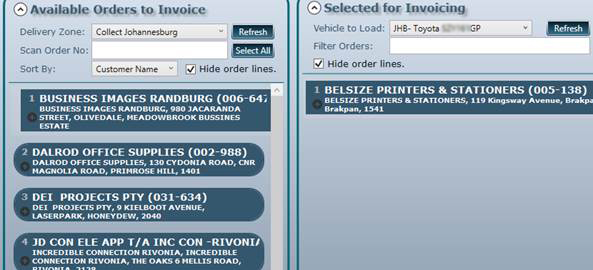
All orders showing in the Selected for Invoicing will be loaded in Parrot Mobile or in the Invoice screen in the same order. To move items up or down the queue, click on the Up or Down arrow.