Back
First Time Setup
Step 1: Request your parrot host to Set up your company group
This initial step is performed by your Parrot ERP host. Your host will set up a company grouping behind the scenes of all the companies which you host through the Parrot ERP System and set them up to operate in a Publication-Subscription Network with each other.
Step 2: Configure your Publisher
Choose the ‘Master’ company from your company group. This is your master data source for syncing data elements across all your companies. Currently the Syncing System is designed as a static hierarchy of Single Publisher > Many Subscribers but if need arises this can be modified to allow Multiple Publishers to be active inside a company network.
2-i: Setting up your Publishing Company Settings
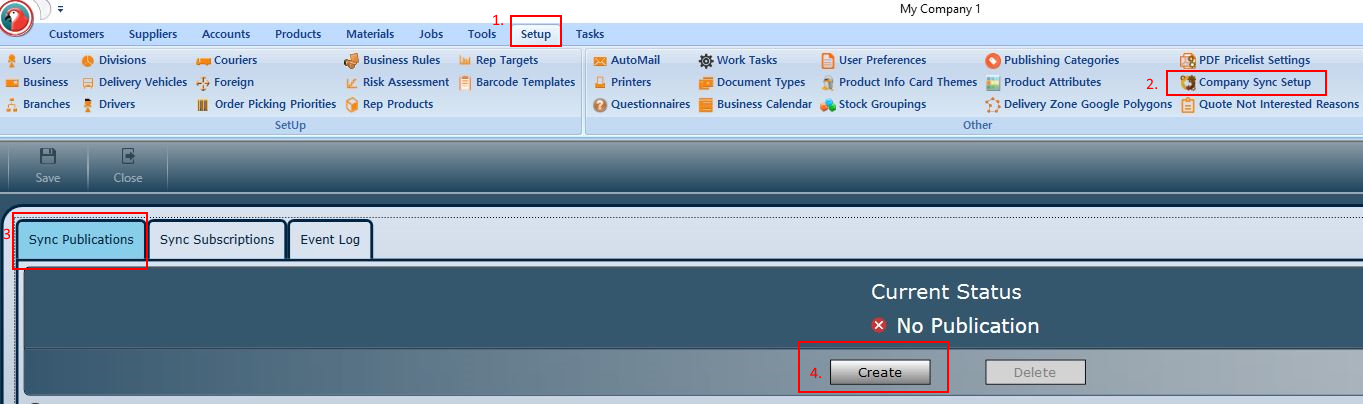
- Navigate to the Setup Page
- Click Company Sync Setup
- Navigate to the Publications tab
- Click Create to Setup your Company as a Publisher
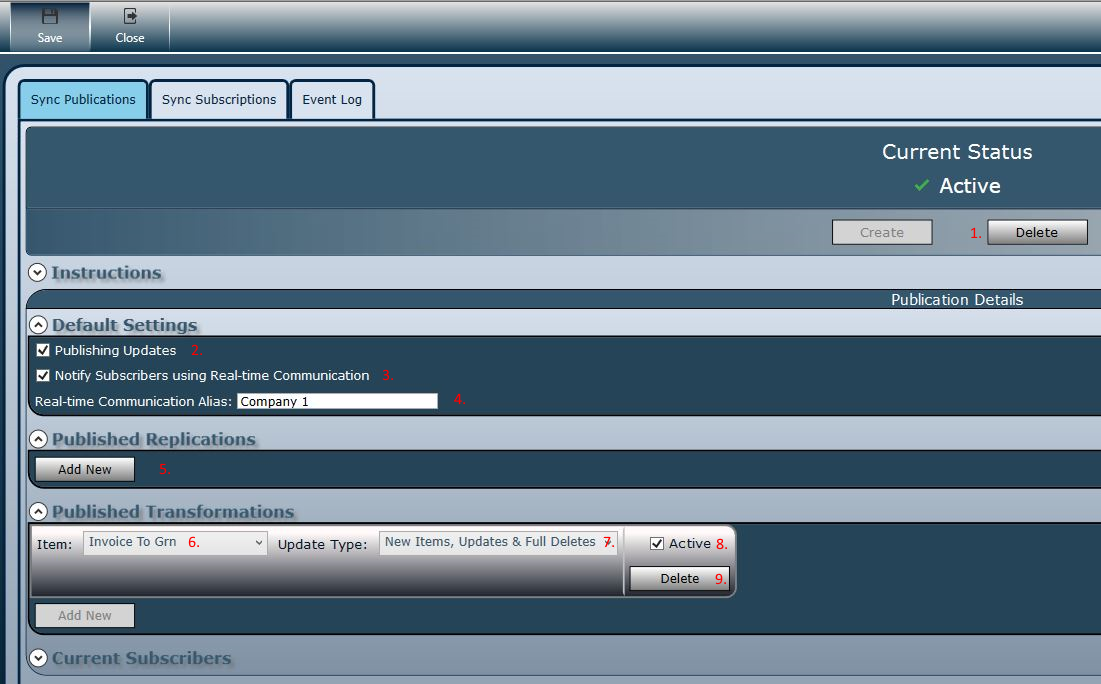
- Once created and saved you can delete the whole publication here.
- Setting denotes if this Entire publication is Publishing or not, global on/off functionality.
- Notify Near Real Time (NRT). Turn this on to have updates automatically cross update in Real-time. If this is off a User will need to request updates on each subscriber for them to be received/request a job to run per subscriber at an interval to check.
- Set an Alias to Communicate with using NRT.
- The Add New button will be visible if you have not set up to Sync Replications or Transformations (Replications relate to 1:1 Sync Items like Products, Transformations are a:b Sync Items Like Invoices:Grns.
- Select the Item to Publish Sync Updates for.
- Select the update type. In general, it is always recommended to use New, Update & Full Delete as your default. For further insight into this setting contact support.
- Turn a Particular Item within the Publication On/Off using this checkbox.
- Delete a Particular Item within the Publication.
2-ii: Setting up your Publishing Customers
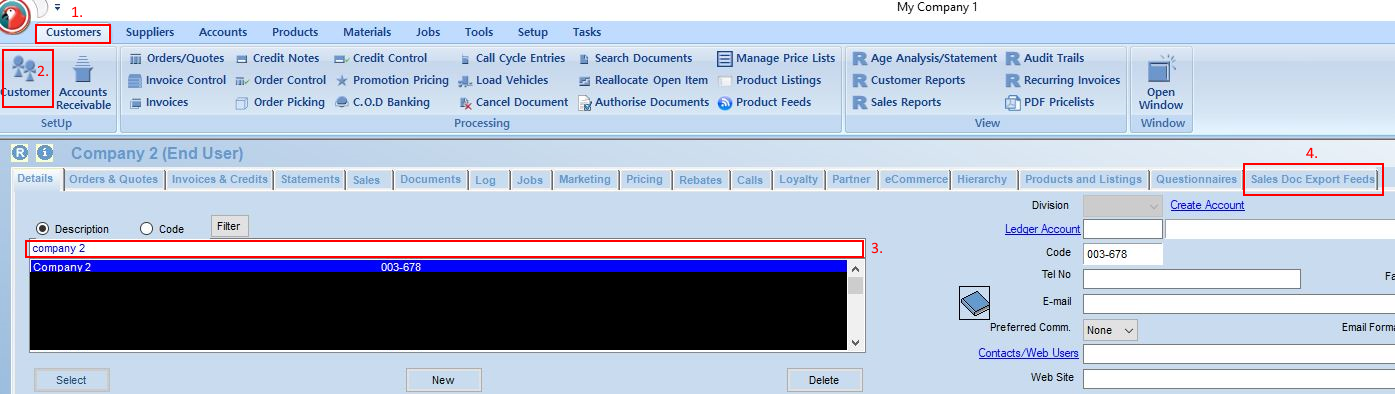
- Navigate to Customers.
- Customer.
- Choose/Create a Customer Account. This account represents your sister company that is going to Subscriber. In the Above Example Company 1 is our Publisher, Company 2 is a Sister company we Sell to.
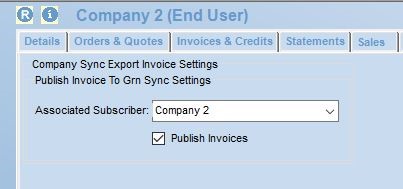
- Navigate to Sales Doc Export Feeds tab.
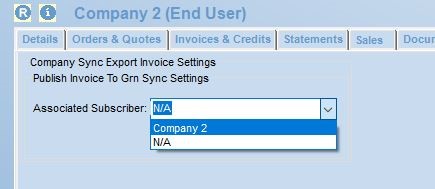
Choose Company 2 the Actual Subscriber.
NB: If you sister company is not shown, you must first set it up as a subscriber to the network against (in this case) Company 1 the Publisher. If you have already done this step and it is still not present, contact support.
Step 3: Invoices and Recurring Invoices
All that is required is for the Export to Sync Checkbox to be ticked on the Invoice and Recurring Invoice Screens. This defaults to the Customers Value and is not changeable unless the Invoicing User has the Appropriate Rights.

Step 4: Configure your Subscriber(s)
4-i: Setting up your Subscribing Company Settings.

- Navigate to Setup.
- Navigate to Company Sync Setup.
- Choose the Company You wish to Subscribe to from the Available Publications Drop Down.
- Click the Subscribe Button to Setup your Subscription.
NB: If the available Publication is not present in the list, it must first be created on the publishing company. If it exists on the Publishing country and your list is still not updated after closing and re-opening the screen, Contact Support.

- Click Unsubscribe to completely dissolve your Subscription to the selected Publisher.
- Toggle this Check to turn receiving updates on/off for your Subscription.
- Toggle to Receive NRT Update Notifications. If off, A User will have to request new updates periodically from Within ERP/request a Job be set up to request updates at a fixed interval.
- Create a Communication name alias for the NRT communications.
- Select the Item you wish to subscribe to.
- Select the Update type for your item. In general, it is always recommended to use New, Update & Full Delete as your default. For further insight into this setting contact support.
- Toggle this flag if you want to enable Automatic sync mappings. In both Replications and Transformations, this will turn on items being allowed to auto complete without any user intervention. If you require to review all invoices before they are converted leave this setting off.
- Turn this setting on to Send Update Email Notifications when Update are Automatically converted and/or are received from the Publisher.
- See required Items that must also Sync for this Item and turn on/off any optional sync items. For Invoice to Grn, there are currently no associated Items that must also be Synced.
- Set up your email run for notifications.
- Custom Recipient E-mail address box.
- Set this Individual Item within the Subscription on/off using this check box.
- Delete this Individual item within the Subscription.
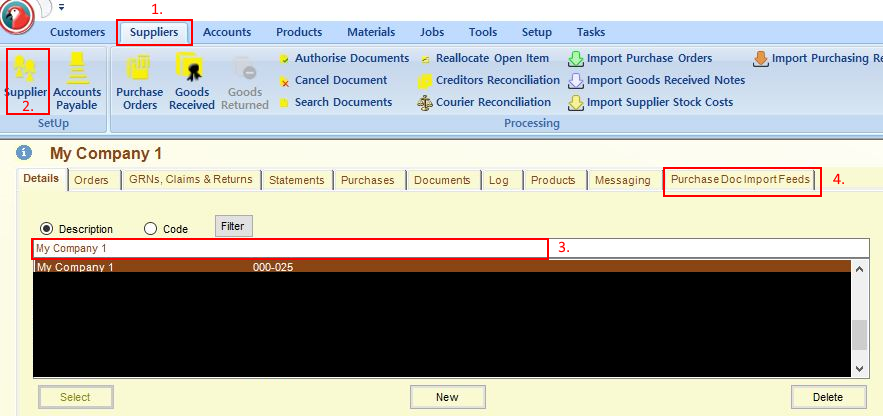
- Navigate to Suppliers.
- Navigate to Supplier.
- Select the Publishing Company Supplier from whom you buy product.
- Navigate to the Purchase Doc Import Feeds tab.
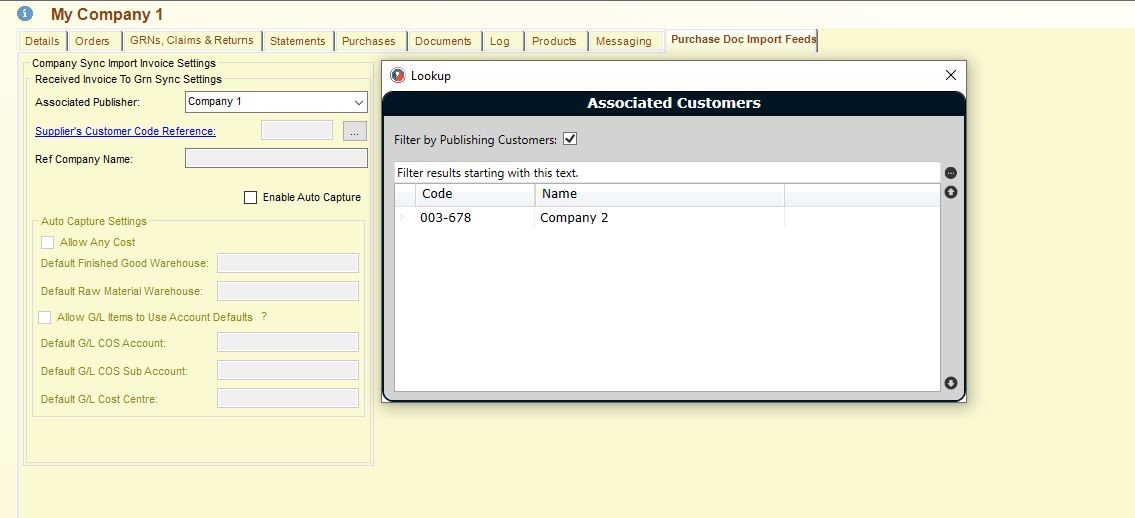
Associate the Supplier to the Actual Publishing Company in the Drop Down. You can then find the actual ‘customers’ they are publishing invoices for and associate it to your company. In this case they publish a customer company 2 and we ARE in Company 2 so we link these together.
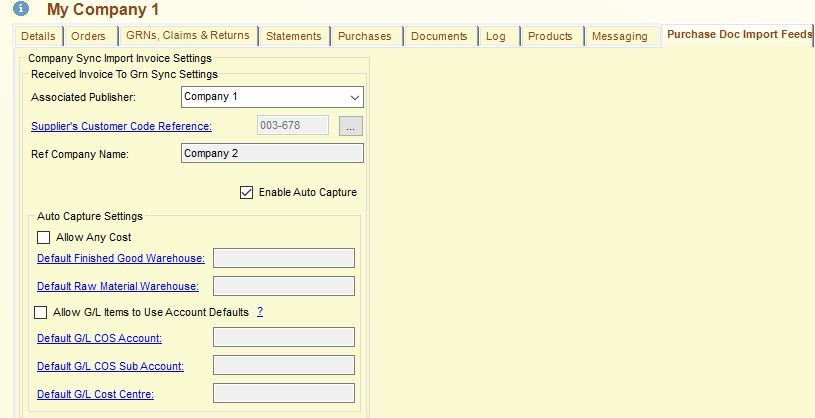
If you enable Auto Capture, you will be required to fill out the auto capture defaults for your items. Note that if you do not use Raw Materials, this may be left blank, and Cost Centres will not be available if you do not use Cost Centres in your company.
Step 5: Manual Import Procedure for Syncing GRN Documents
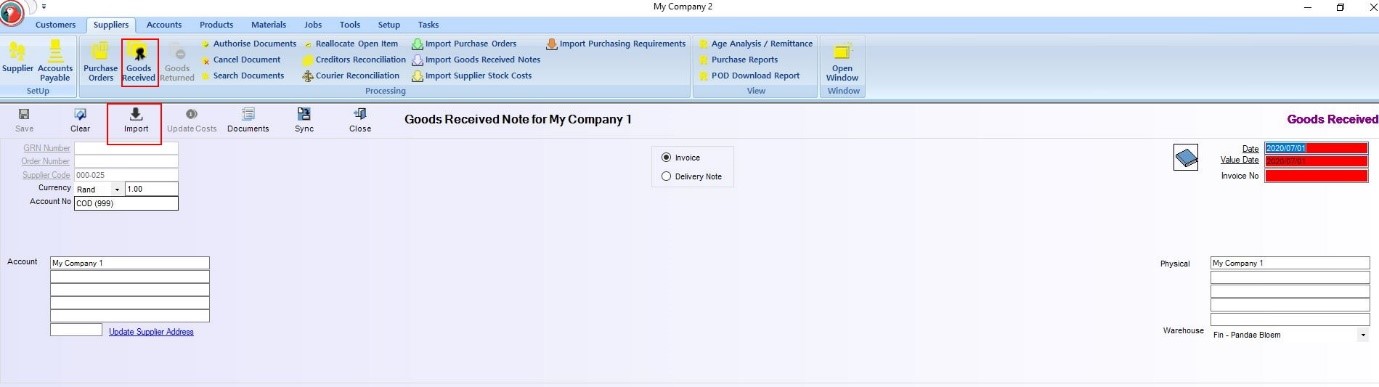
5-i: Navigate to the GRN Screen in ERP on the Subscribing Company, and Load the Supplier Linked to the Publisher and click the Import button on the top tool bar.
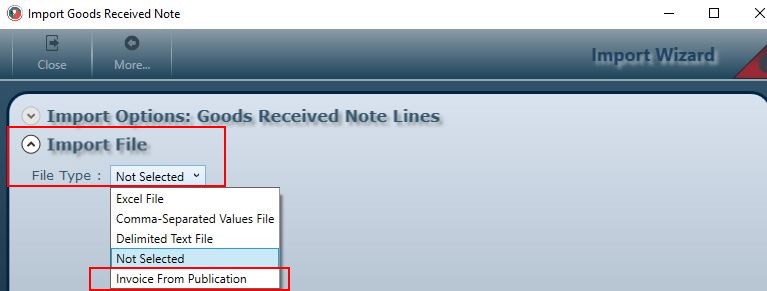
5-ii: on the Screen which opens, click the Select File button

5-iii: Select the Invoice from Publication Import File Type from the drop down. If this is missing it may mean your subscription is not set up or has been flagged as inactive.
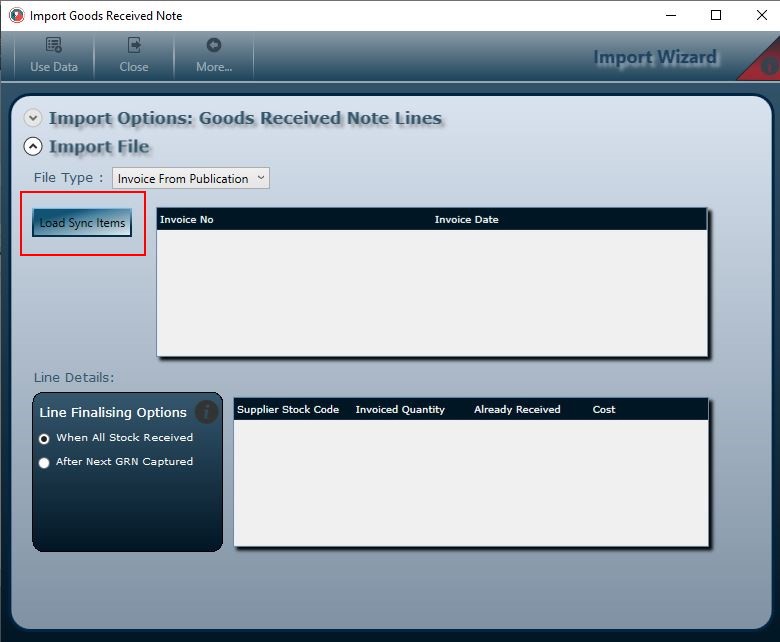
5-iv: Click the Load Sync Items button to manually check for waiting Invoices and to load them into the Import Wizard.
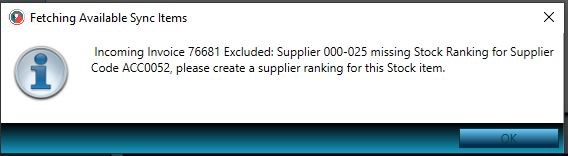
5-v(Optional): If there is an issue with an Invoice, it will show after the begin sync button has been clicked
The mentioned invoice will not be available for import until the underlying issue has been fixed. In our case, a Supplier Ranking is missing for a stock item. All stock items that have to be warehoused must have a stock ranking.
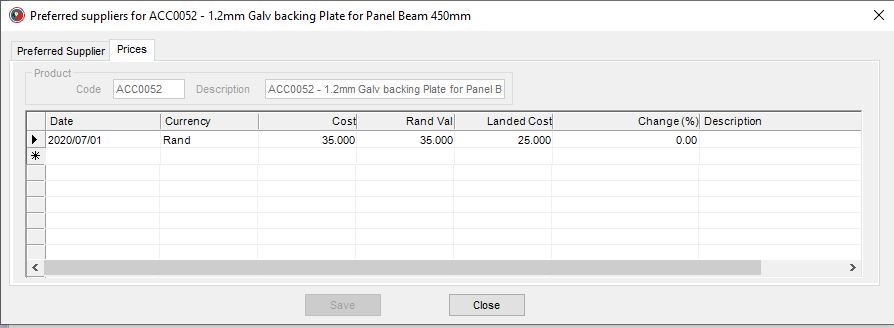
Step 5-vi (Optional): Supplier Rankings are set up as below on the Products Tab as per normal

5-vii: The Available Invoices will load into the wizard. Clicking an Invoice in the Top Row will show the rows in the second view on the screen and highlight it as the selected invoice to import.
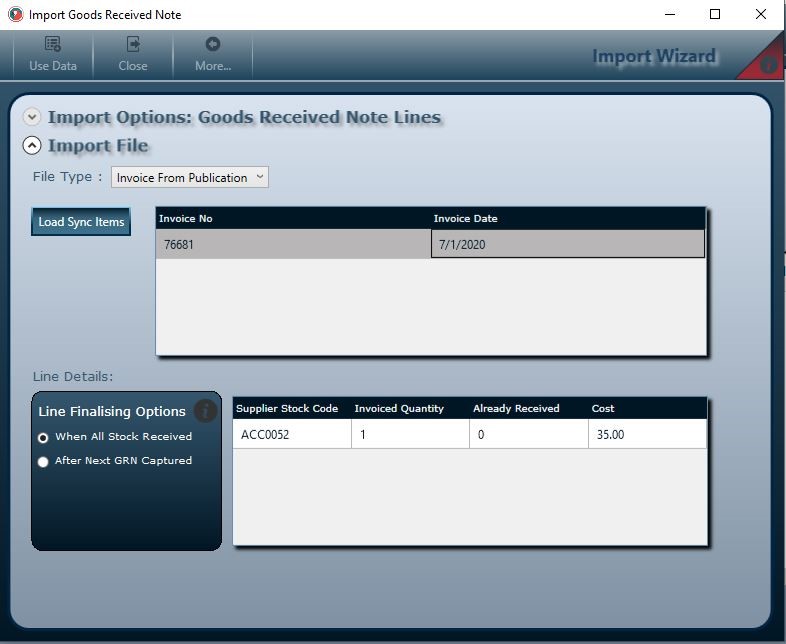
5-viii: Choose finalising options.
By Default, this is ‘when all stock received’ in this case if 2 Items are invoiced and you only Capture one, this invoice will persist for import until all stock is received. After next grn will force the Invoice closed even if not all stock has been received.

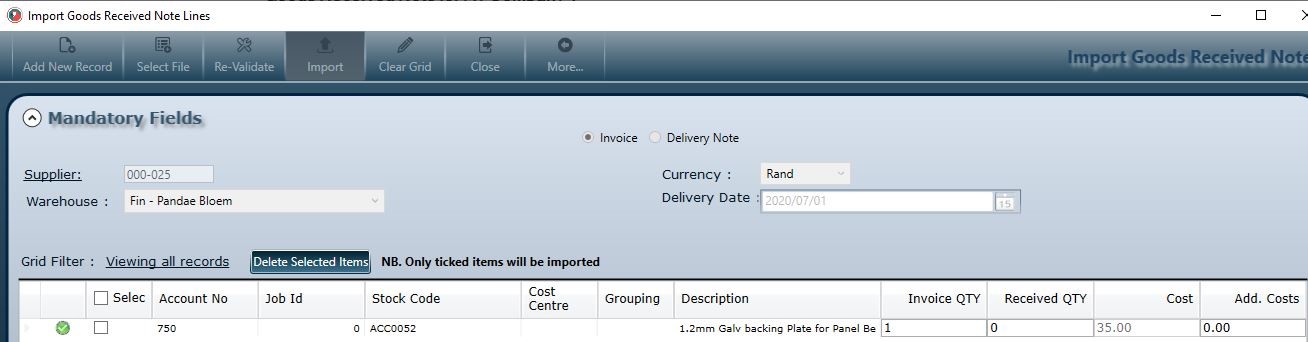
5-viv: Click Use Data to import the Invoice and its lines.

5-x:The item will now appear in the import grid. You may adjust your Received Qty/Additional Costs and Cost Centre (If applicable) here.
5-xi: Select the Rows next to account to signify which lines you will import and click the import button.
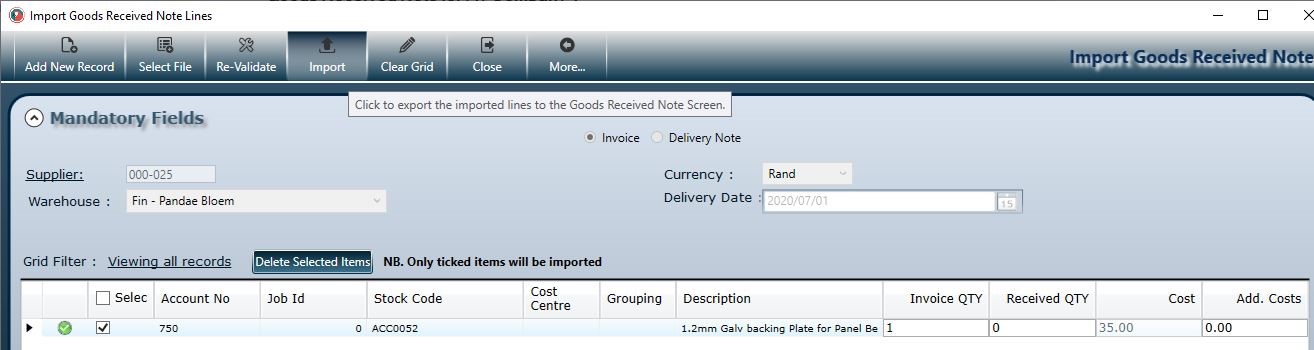
5-xii: Continue to Save the GRN as normal
If you require training on the GRN Screen itself please contact Parrot Support and they will assist and/or refer you to the next available training session.
Step 6: Automated Import Procedure for Syncing GRN Documents.
The automated procedure works after turning on the Auto create Item Sync Mappings tick box on the Setup of the Subscriber.
6-i: User Controlled Auto Grn.
Open the GRN Screen and click Sync. All Invoices waiting to be converted to GRNs for ALL suppliers will be automatically converted. In the event of an error/issue/lack of supplier ranking an e-mail is sent to any custom recipients set up in the Initial Subscription Setup screen. These items must be corrected and then Re-Synced or can be manually Imported at any time as well as per the previous Step in the document.

6-ii: System Controlled Auto Grn.
NB: Please inform your PARROT HOST of your intent to use System Controlled Auto Grn functionality as they will need to activate your company their side to process the Near Real time communication messages.
With System Controlled Auto Grn functionality each invoice will attempt to sync as it is received by the Company. Again, problems will prompt email notification and must be resolved/manually imported as per the previous step in this document.