Back
Contents
1. Sales Quotations
1.1 Sales Quotation Overview
1.1.1 Screen Buttons
1.2 Creating a new Customer Quotation
1.2.1 Creating a new Quotation for a customer
1.2.2 Creating a new Quotation from a Copied Quotation
1.3 Customer Information
1.4 Important Quotation Properties
1.5 Authorising Quotations
1.6 Summary, Messages Sections tabs
1.7 Adding line items for the quotation
1.8 Saving the quotation
1.9 Adding sections to the Sales Quotation
1.10 Sales Quotation status
1.11 Sales Quotation menu
1.12 Sales Quotation Reports
1. Sales Quotations
1.1 Sales Quotations Overview
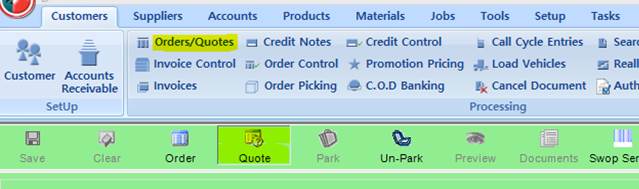
The Sales Quote screen is used to capture quotations on the system for a selected customer. To access the Sales Quote screen, click on the Order/Quotes menu in the Customers tab as highlighted below.

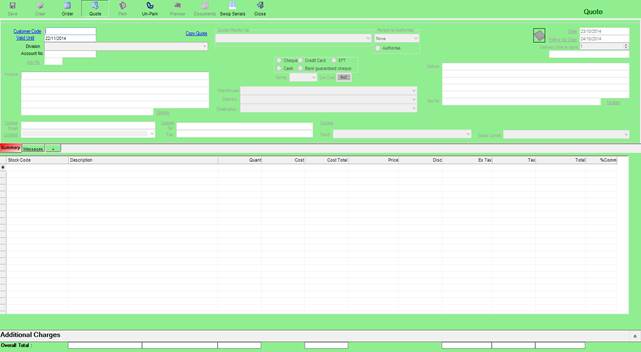
Once the screen opens, click on “Quote” to switch to the Quotes screen. This should open the screen as depicted below.
1.1.1 Screen Buttons
The following operations can be performed from the top buttons on the Sales Order screen.
Save – This will save the Quotation once completed
Order / Quote – This allows the user to switch between the orders and quotes screens
Park / Un-Park – This will save the quotation temporarily if the user wishes to continue working on it at a later stage. The parked Quotation will be available until the user saves it as a formal customer quote.
Preview – This will show a preview of the printed quotation. Documents – This enables you to attach documents related to this quotation, e.g. an email from the customer.

1.2 Creating a new Customer Quotation
The following options are available when creating a new Customer Quotation:
- A Customer Code can be selected in quotation to load the Customer Details
- An archived/ active quotation can be copied.
- And a combination of the above; a Customer Code can be loaded and then an archived/ active quote can be loaded for the Customer.
1.2.1 Creating a new Quotation for a Customer
To create a new quotation for a Customer, simply open the “Orders/ Quotes” screen, switch to “Quotes” and enter a valid Customer Code.
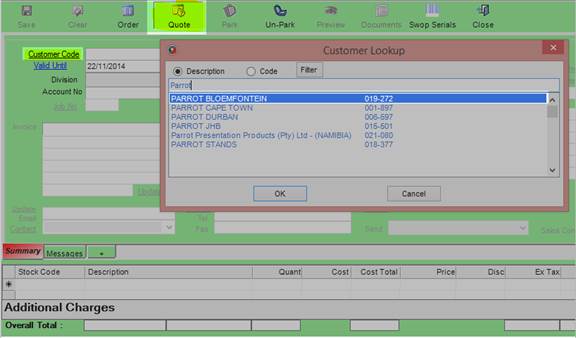
The Customer Code link can also be clicked to launch a look-up from which the user can select the Customer to create a quotation for.
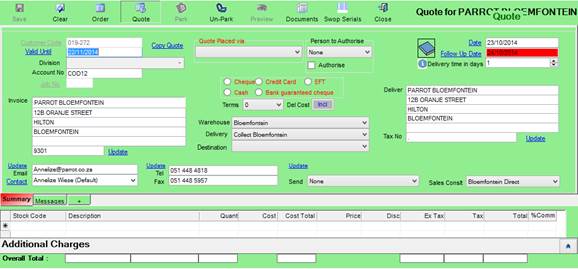
Once the Customer details are loaded, the mandatory fields are highlighted in red as depicted below. The “Quote Placed Via” option needs to be selected before any items can be added to the line item’s grid.
1.2.2 Creating a new Quotation from a Copied Quotation
The system allows the user to copy the content (line items) from an active/ archived quote for any Customer. To copy an archived quotation in order to create a brand new quotation, open the “Orders/ Quotes” screen and switch to the “Quotes” screen.
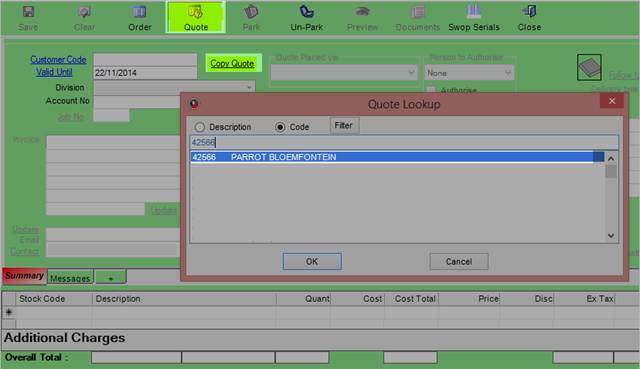
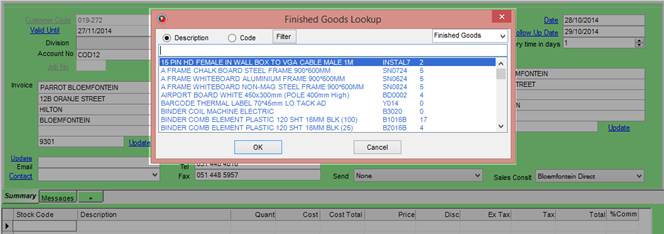
On the quotations screen, click on the “Copy Quote” link and a look-up will be opened as depicted below. The quotation can be found by looking for the Customer Name (when the Description option is selected) or by the Quotation Number (when the “Code” option is selected).
Click “Ok” to load the quotation on the screen.
1.2.2 Creating a new Quotation from a Copied Quotation
The system allows the user to copy the content (line items) from an active/ archived quote for any Customer. To copy an archived quotation in order to create a brand new quotation, open the “Orders/ Quotes” screen and switch to the “Quotes” screen.
On the quotations screen, click on the “Copy Quote” link and a look-up will be opened as depicted below. The quotation can be found by looking for the Customer Name (when the Description option is selected) or by the Quotation Number (when the “Code” option is selected).
Click “Ok” to load the quotation on the screen.
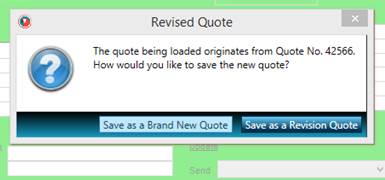
Once the “Ok” button is clicked, a screen will be shown which prompts the user to decide whether the new quotation will be a brand new quotation or a revision of the quote. The user will only be prompt to make this choice only if the no Customer Code is loaded (no Customer Details are available on the screen) or the quotation copied was saved for the same Customer Code that is already loaded on the screen.
A brand new quotation has no association to any quotation that was previously saved.
A revision of a quotation will create a link between the new quotation saved and the quotation which was copied.
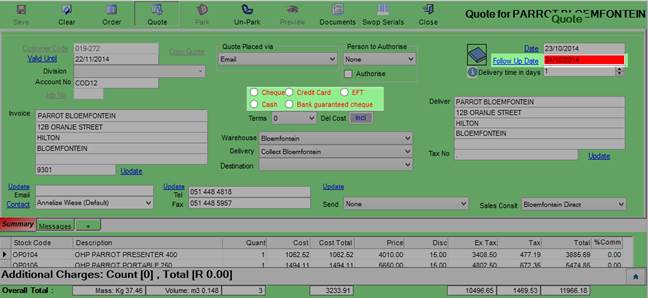
Once the quotation to be copied is loaded on the screen, the mandatory fields will be highlighted in red. If the fields are already filled in, simply click on them to confirm the information that is already entered.
1.3 Customer Information
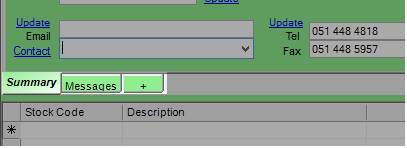
he Invoice and Delivery address will be the default address added in the Customer screen. The user is able to change these addresses specifically for this quotation. If the address must be applied to the Customer as a whole then the “Update” must be clicked. This will update the Customer’s default Invoice and Delivery addresses.
This also applies to the contact details. They can be updated specifically for the new quotation and the user can also update the Customer’s default contact details as well the medium for communication (send the quotation for the Customer etc.)
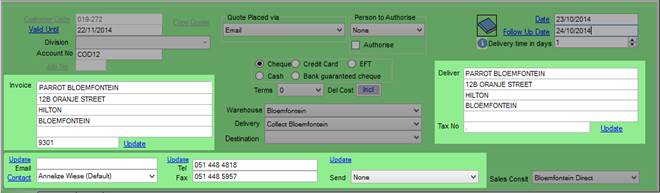
In the image above, you will notice that there are multiple Update links. Clicking any of these Update links will update the default customer information in the Customer screen.
1.4 Important Quotation Properties
Below is a list of important information and properties that must be considered carefully before the Quotation can be saved.
| Customer Code |
The customer code entered or selected that this quotation will be created for. |
| Valid Until date |
This is the date on which the quotation will expire. The price will no longer be relevant after this period |
| Division |
Division name if company divisions exist |
| Account No |
The Customer Account No (this cannot be edited) |
| Job No |
Enter the Job No if the quotation must be linked to a Job |
| Quote Placed Via |
This option needs to be selected before any line item can be added as method used to place the quotation (channel) could affect the stock prices. |
| Valid Until |
The date on which the quotation will expire. |
| Person to Authorise |
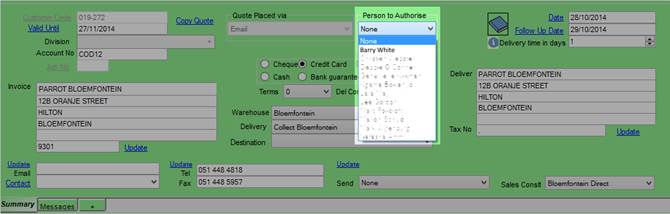
Select this option if the quotation needs to be authorised by another user (manager/ supervisor) before it can be sent out to the Customer. |
| Follow up date |
Date on which a follow up on the quotation is expected, if the quotation is not yet converted to a Sales Order |
| Invoice (Address) |
The address that will appear on the invoice. |
| Delivery (Address) |
The address where the goods will be delivered. |
| Payment Method and Terms |
The payment terms will default to the value selected in the Customer screen, but can also be changed if required. No default payment method is selected and has to be selected before saving the quotation. |
| Warehouse |
The warehouse where the stock should be ordered from. The default warehouse is set on the Customer screen. |
| Delivery |
This is an area where the customer will have the goods delivered. |
| Destination |
The Destination is only applicable if the Delivery is a courier. |
| Contact Information |
The customer’s contact information. This is also taken from the Customer screen, but can be changed as needed. |
| Sales Conslt |
This is to select the sales consultant responsible for the customer / sale |
1.5 Authorising Quotations
Parrot ERP System allows the quotations to be authorised before they can be sent to the Customer via email or fax when the quotation is saved. The person to authorise the quotation can be selected from the drop down list. Once the quotation is saved, an email will be sent to the selected person.
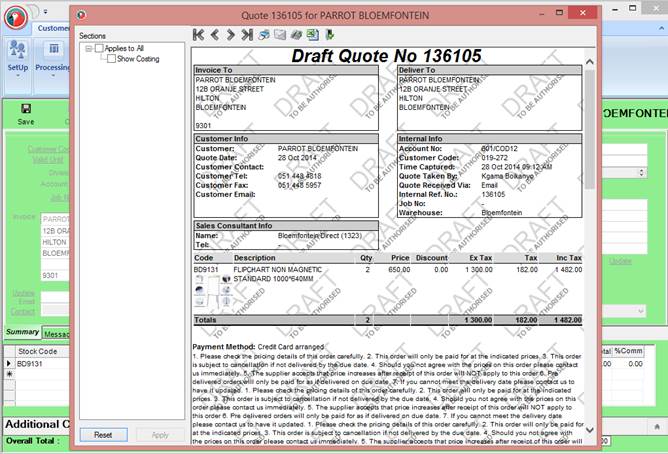
The quotation which is not authorised will be shown as a Daft Quote until it is authorised.
When the quotation is listed for the Customer’s quotations, the “Authorised By” property will display the text “Unauthorised” to indicate that the quotation is not authorised.

To authorise a quotation, click on the “Customers” tab and click on the “Authorise Documents” menu. Alternatively, open the Customer Screen, select the Customer and click on the “Orders & Quotes” tab. Another alternative is to click on the “Search Documents” and select the “Quotes” option.
Locate the quotation and right click on it. The Quotations menu will appear and an option to “View Quote and Authorise” will be available.

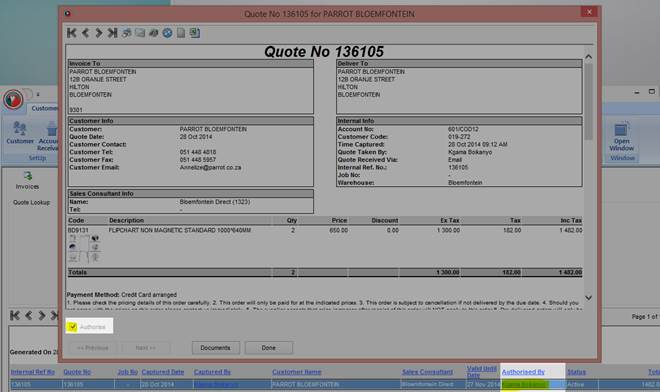
Once the Quote the authorisation screen is opened, the click on the “Authorise” box and click on “Done” to commit the changes made. The quotation will be sent to the Customer by email or fax if it was saved to do so.
Once the quotation is saved, the “Authorise” box on the authorisation screen will be greyed out and the “Authorised By” field on the list of quotations will show the name of the person who authorised the quotation.
1.6 Summary, Messages Sections tabs
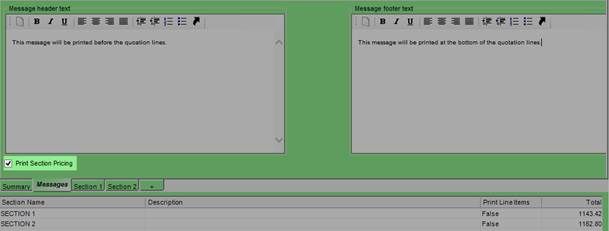
You will notice three tabs in the bottom on the quotation information. Summary, Messages and a plus (+) sign.
Summary: This tab will show the customer and payment information for the quotation.
Messages: On this tab you can add any information that will be printed on the quotation as a Header and Footer section.
Plus sign (+): This is used to create sections for the quotation. Each section can have different products added to it, and can also have a Section Description and Section Story added. Sections are explained in more detail below.
1.7 Adding line items for the quotation
To add products to the quotation, click on the Stock Code field in the grid below the quotation information. You can then type in the product code and press enter. Alternatively you can double click the cell or press the “ALT” and “Z” keys on the keyboard simultaneously to bring up a search screen to search for the product that you require.
As more products gets added to the quotation, the totals will be calculated and displayed in the below the relevant columns.

1.8 Saving the quotation
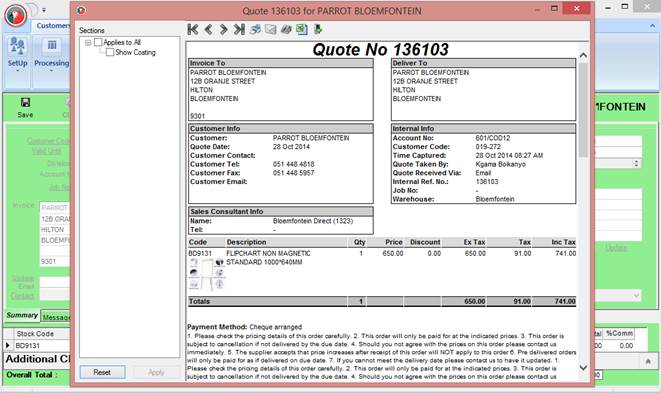
Once the quotation is completed, click on the save button to create the quotation. Once the quotation is saved on the database, you will be asked if you want to view it. The quotation will be show on a new screen as depicted below.
1.9 Adding sections to the Sales Quotation
Sections can be used to break up the quotation into groups or allied products, or products for different departments etc. Each section can have its own description and additional information to explain the content or purpose of the section.
Note that the totals will be shown for the currently active section. If you wish to see the totals for the overall quotation, you need to click on the summary tab.
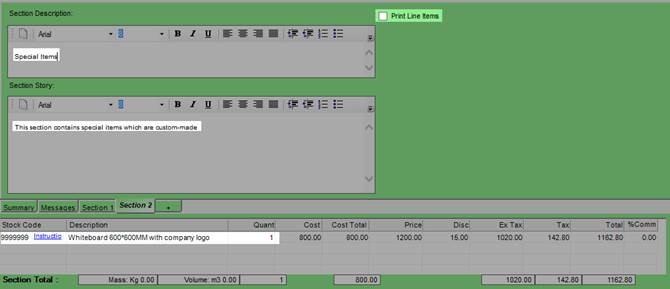
There is another option “Print Line Items” that can be set for each of the sections. This will show or hide all of the products that has been entered for that section.
Section 1 has two products added and will print the line items with the quotation.

Section 2 has only one item added, and will not print the line item.
When printing out the quotation, the sections will be displayed as below. Each section has its description and message printed, and Section 1 has the products that’s been added to that section.
The sections also have a Header Message Text printed at the top, and Message Footer Text printed at the bottom. This has been set in the Message tab as explained above.
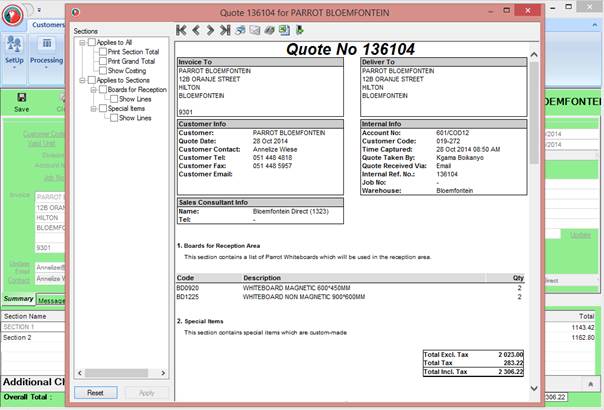
In order to show the totals (for the Ex. Tax, Tax and Incl. Tax values), the “Print Section Pricing” box must be ticked. This is found in the “Messages” tab as depicted below.
1.10 Sales Quotation status
The sales quotation status can be viewed by going to the Search Documents screen to search for quotations, or by going to the Customers Screen and opening the “Orders & Quotes” tab and clicking on “Quotes”.

A sales quotation can have anyone of the following statuses:
| Status |
Description |
| Active |
The quotation is active and it is yet to be converted to a Sales Order |
| Archived |
The quotation is converted to a Sales Order |
| Cancelled |
The quotation is cancelled |
1.11 Sales Quotation Menu
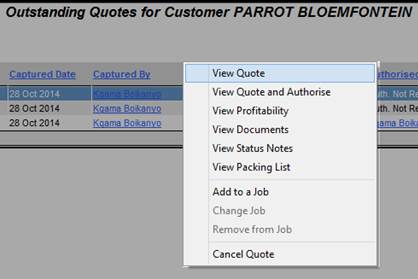
The following context menu is available on the quotes when you right-click on the selected quotation line.
| Menu |
Function |
| View Quote |
Opens the quotation for viewing purposes |
| View Quote and Authorise |
Opens the authorisation screen which allows you to view and authorise the quotation |
| View Profitability |
The quotation is cancelled |
| View Documents |
Opens the screen which lists documents attached to the quotation |
| View Status Notes |
Opens the screen which lists all the notes added for the quotation |
| View Packing List |
Opens the packing list for the quotation |
| Add to a Job |
Opens a screen which list all the Job currently available. The user can select any Job to assign the quotation to |
| Change Job |
If the quotation is already attached to a Job, the user can assign the quotation to another Job. Opens a screen to allow the user to select another Job |
| Remove from Job |
Removes the Job links to the quotation |
| Cancel Quote |
Cancels the quotation |
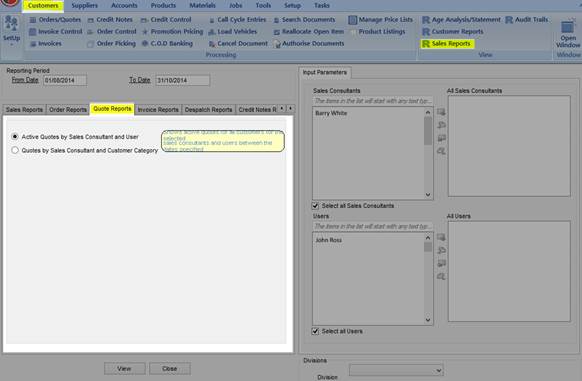
1.12 Sales Quotation Reports
The following reports are available from the “Sales Reports” screen. To open this screen, click on the Customers menu and click on “Sales Report”.
Two reports are available:
- Active Quotes by Sales Consultant and User
- Quotes by Sales Consultant and Customer Category