Back
Contents
1. Setting up the Sample Application
2. Running the Sample Application
Parrot Portal Sample App Source code
View/Download our Sample App Source Code from GitHub at the following link: https://github.com/ParrotERPInfo/ParrotPortalSampleApp
1. Setting up the Sample Application
In order to run the ParrotPortalSampleApp, you will need to have the following program(s) installed:
- Microsoft Visual Studio 2015 (Community Edition or higher)
- .NET framework 4.5 (this should be installed with Visual Studio 2015)
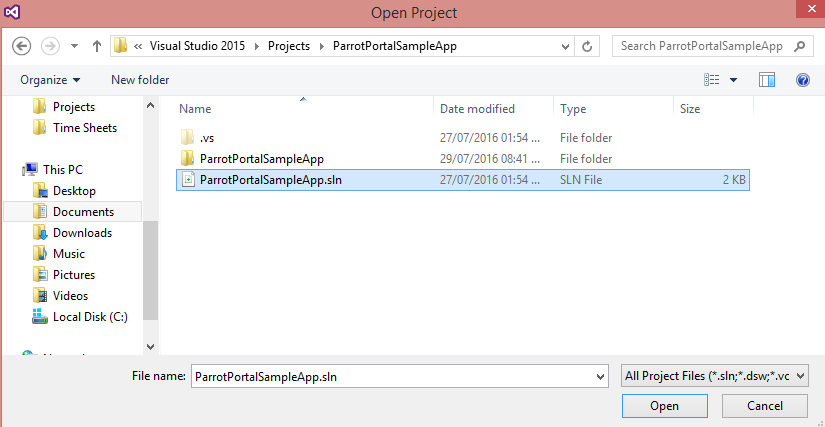
Once Visual Studio is open, click on file and open Project/Solution, then browse to where you have extracted the ParrotPortalSampleApp, click on the ParrotPortalSampleApp.sln file and select Open.

Once you have opened the Solution you will be presented with the screen below:

Once this is loaded, simply press F5 to start debugging or click on the Debug menu and select Start Debugging.
2. Running the Sample Application
Once the Application has started, you will be presented with the screen below:

To attempt to connect to the service, you will need to enter the correct Username and Password and then click the test button. This Username and Password will be allocated for you by Parrot.
Parrot will notify you if you must check the ‘User password and Portal password match’ checkbox or not. In most cases, it will be checked.
If the connection to the Parrot Portal was successful, the following data will be displayed, note that the picture displayed will be updated based on the selected product (if the product has a picture):

Else an error message will be displayed, such as the one below:

Please consult the Summary of Available Services Documentation for a complete list of all available services on the Portal.